

The Ultimate Guide to Changing Patio Door Locks for Better Security
Change a Sliding Door Lock for Better Patio Security
Changing a sliding door lock is usually a straightforward DIY job when you buy a matching replacement. First, identify whether your door uses a mortise lock inside the door edge or a surface-mounted latch. Then measure the screw-hole spacing, door thickness, and lock-body dimensions before removing the old hardware. Many patio doors use spacing near 3-15/16 inches, but measurements matter more than assumptions.
A new lock can restore smooth operation and improve security when the old one is loose, corroded, stiff, or no longer catches the strike plate. Before replacing parts, check whether the door has sagged on its rollers. A small roller or strike-plate adjustment can sometimes solve an apparent lock failure.
In this guide, you will learn how to select a compatible lock, remove the old handle and mortise cartridge, install the replacement, and fix common alignment problems.
I am Voytek Glab, owner of Perfect Windows & Siding, with more than 20 years of hands-on carpentry and exterior remodeling experience across the Chicago suburbs. That experience includes changing sliding door lock hardware and diagnosing whether a patio door needs a new lock, an alignment adjustment, or more complete repair.
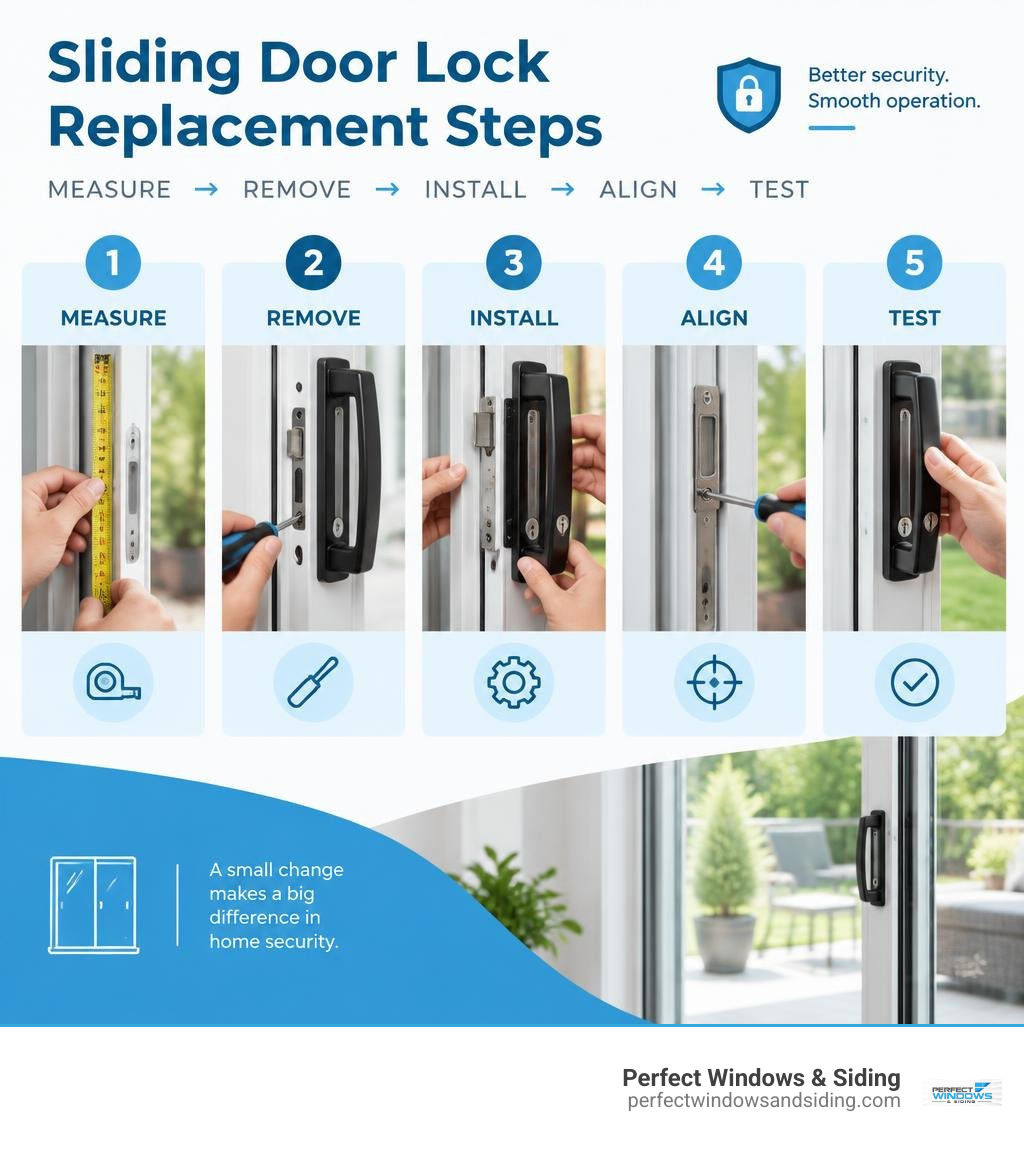
Simple changing sliding door lock word guide:
- aluminium sliding door lock replacement
- glass door roller replacement
- install weather stripping sliding glass door
Sliding Door Lock Types and Selection Guide
Choosing the correct hardware is the most critical step when updating your patio door. Sliding doors operate horizontally, which means standard deadbolts made for hinged swinging doors cannot withstand the lateral forces involved. Choosing the right lock style protects your home and preserves your door frame.
Modern patio systems generally use one of three primary hardware configurations:
- Mortise Locks: The standard for modern patio units. The mechanical lock body sits inside a pocket (mortise) cut into the door’s edge stile. When engaged, an internal cam swings a heavy steel hook into an anchored frame keeper.
- Surface-Mounted Clamp Latches: Commonly found on older aluminum units. These mount directly onto the interior surface of the door frame and clamp down onto an exterior strike plate.
- Multi-Point Locking Systems: The highest-security option available, featuring multiple locking points (often two to four heavy hooks or deadbolts) extending along the vertical edge of the door panel into the jamb.
| Lock Type | Security Level | Best Door Material | Installation Complexity | Common Fastener Spacing |
|---|---|---|---|---|
| Mortise Lock Body | High | Vinyl, Wood, Clad Aluminum | Moderate (Cartridge pocket) | 3-11/16″ or 3-15/16″ |
| Surface-Mounted Latch | Moderate | Older Aluminum, Thin Hollow Stile | Low (Surface screw-on) | 4-15/16″ to 6-5/8″ |
| Multi-Point Mechanism | Maximum | Premium Custom Patio Doors | Advanced (Requires exact gear alignment) | Continuous Gear Drive |
If you are upgrading an older metal unit, review our guide on aluminium sliding door lock replacement to match your exact stile profile.
Measuring Door Thickness and Spacing Before Changing Sliding Door Lock Components
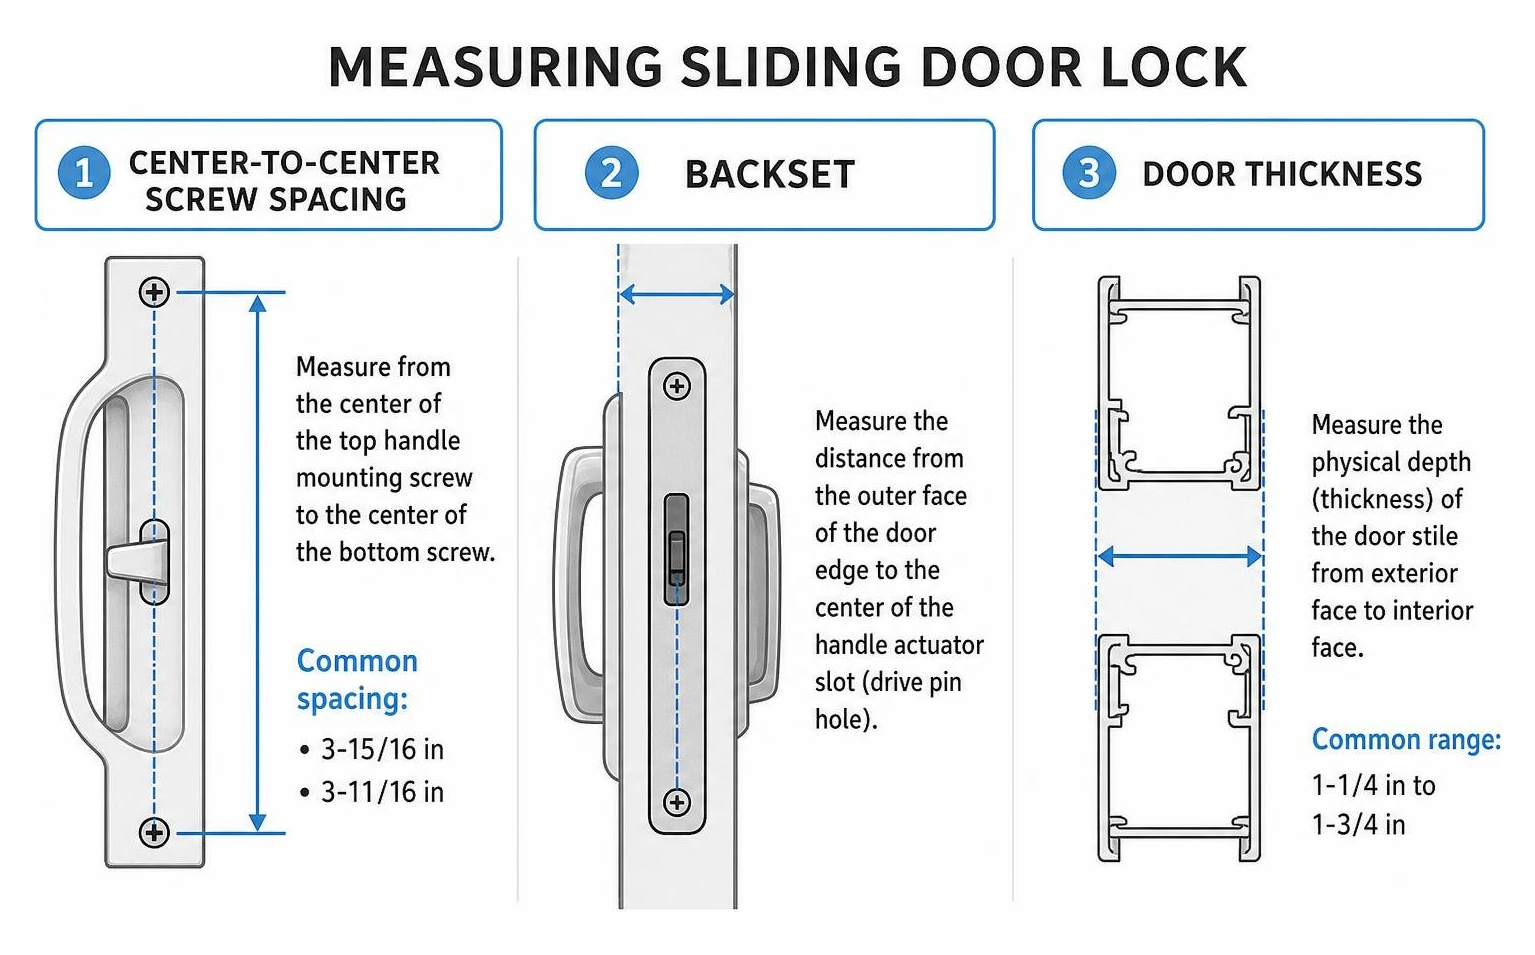
Before ordering hardware, take precise measurements of your existing unit using a standard tape measure or digital calipers:
- Center-to-Center Screw Spacing: Measure from the center of the top handle mounting screw to the center of the bottom screw. The industry standard across Chicago homes is 3-15/16 inches, though 3-11/16 inches is also common.
- Door Stile Thickness: Measure the physical depth of the door edge. Standard residential patio doors range from 1-1/4 inches to 1-3/4 inches thick. Installing hardware designed for a 1-3/8-inch door onto a 1-3/4-inch heavy-duty panel will result in binding tailpieces.
- Backset and Mortise Depth: Measure the distance from the outer face of the door edge to the center of the handle actuator slot (drive pin hole), as well as the height and depth of the internal cartridge.
Keyed vs Non-Keyed Considerations When Changing Sliding Door Lock Hardware
Deciding between a keyed cylinder and a non-keyed thumb-turn comes down to accessibility and lifestyle:
- Non-Keyed (Interior Thumb-Turn Only): Ideal if you only use your patio door from the inside. Without an exterior cylinder, there is no keyway for intruders to pick, bump, or tamper with from the outside.
- Keyed Exterior Cylinders: Crucial if your patio door serves as a primary point of entry from a deck, swimming pool, or detached garage. Standard assemblies (such as the Prime-Line E 2014 mortise lock or HauSun handle sets) utilize a wafer or pin-tumbler cylinder with a flat tailpiece that slots directly into the mortise cam.
For reliable burglary resistance, choose handles constructed from solid diecast zinc or marine-grade brass rather than hollow plastics.
Complete Walkthrough: Changing Sliding Door Lock Step by Step
Swapping out a patio lock takes about 30 to 45 minutes with basic hand tools. Read this practical step-by-step sliding glass door lock replacement guide for an extra breakdown of mechanical variations before you begin.
Essential Tools for Lock Replacement
- #2 Phillips head manual screwdriver
- Flathead screwdriver (for light prying)
- Small slotted precision screwdriver (for latch throw adjustments)
- Tape measure
- PTFE dry lubricant or dry graphite spray
- Protective work gloves
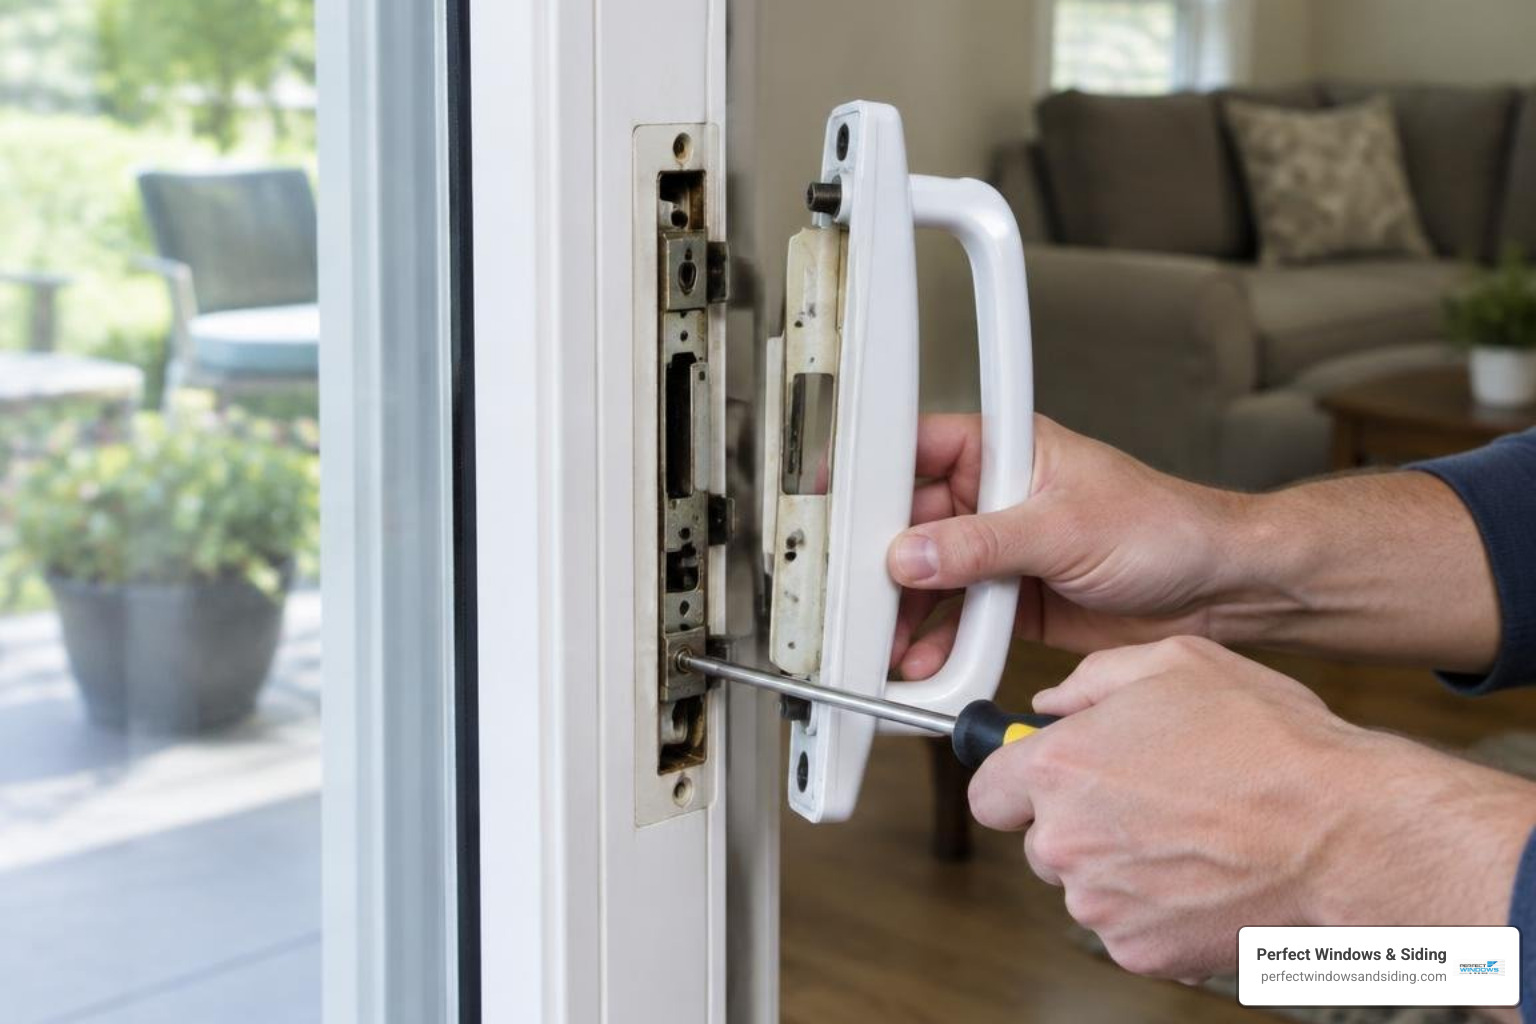
Removing the Old Handle and Lock Cartridge
- Secure the Door Panel: Slide the door open a few inches and brace it so it cannot move while you work on the edge.
- Unscrew the Interior Handle: Locate the two primary machine screws on the interior handle escutcheon plate. Turn them counter-clockwise using a manual #2 Phillips screwdriver. Avoid high-speed power drivers, as they can easily strip the screw threads or crack decorative escutcheon finishes.
- Detach Exterior and Interior Handles: Once the screws are out, gently pull the interior handle away. The exterior pull plate will slide free from the opposite side. If a keyed cylinder is present, slide the cylinder and its flat tailpiece out with the exterior plate.
- Extract the Mortise Cartridge: Look at the edge of the door panel. You will see two faceplate screws holding the mortise lock body in the stile pocket. Remove these screws. Insert a flathead screwdriver into the hook slot and ease the cartridge forward until you can slide it out by hand.
Installing and Securing the New Lock Mechanism
- Check Latch Orientation: Modern mortise locks are reversible. Check your door’s closing direction; the locking hook should point upward when engaged into the jamb keeper. If the hook is upside down, flip the lock body or reverse the hook release switch on the cartridge body.
- Slide the Cartridge In: Slide the new mortise lock into the door stile cavity. Align the mounting holes on the faceplate with the pre-drilled holes in the door edge. Fasten the faceplate screws snugly, making sure not to over-tighten and warp the casing.
- Insert the Exterior Key Cylinder and Spindle: If your lock is keyed, feed the key cylinder tailpiece into the cross-shaped or vertical cam hub in the mortise body. Refer to the manufacturer patio door hardware guide to ensure the tailpiece is cut to the exact length required for your door’s thickness.
- Mount the Interior Handle: Position the interior handle over the door stile, guiding the interior thumb-turn actuator into the opposite side of the mortise cam. Thread the long machine mounting bolts through the interior plate, passing through the door frame and threading directly into the exterior handle plate. Snug both screws evenly.
Testing Latch Throw and Strike Plate Alignment
Before closing the door completely, test the mechanical hook movement:
- Turn the interior thumb-turn: The hook should snap forward with positive spring tension.
- Rotate the key from the exterior: The hook should extend fully without resistance or dragging.
- Gently pull the door toward the jamb: Verify that the hook enters the center of the strike plate (keeper) cavity cleanly without striking the upper or lower metal lip.
Troubleshooting and Long-Term Maintenance
If your newly installed lock binds, grinds, or refuses to latch, the culprit is almost always door sag rather than a defective lock mechanism.
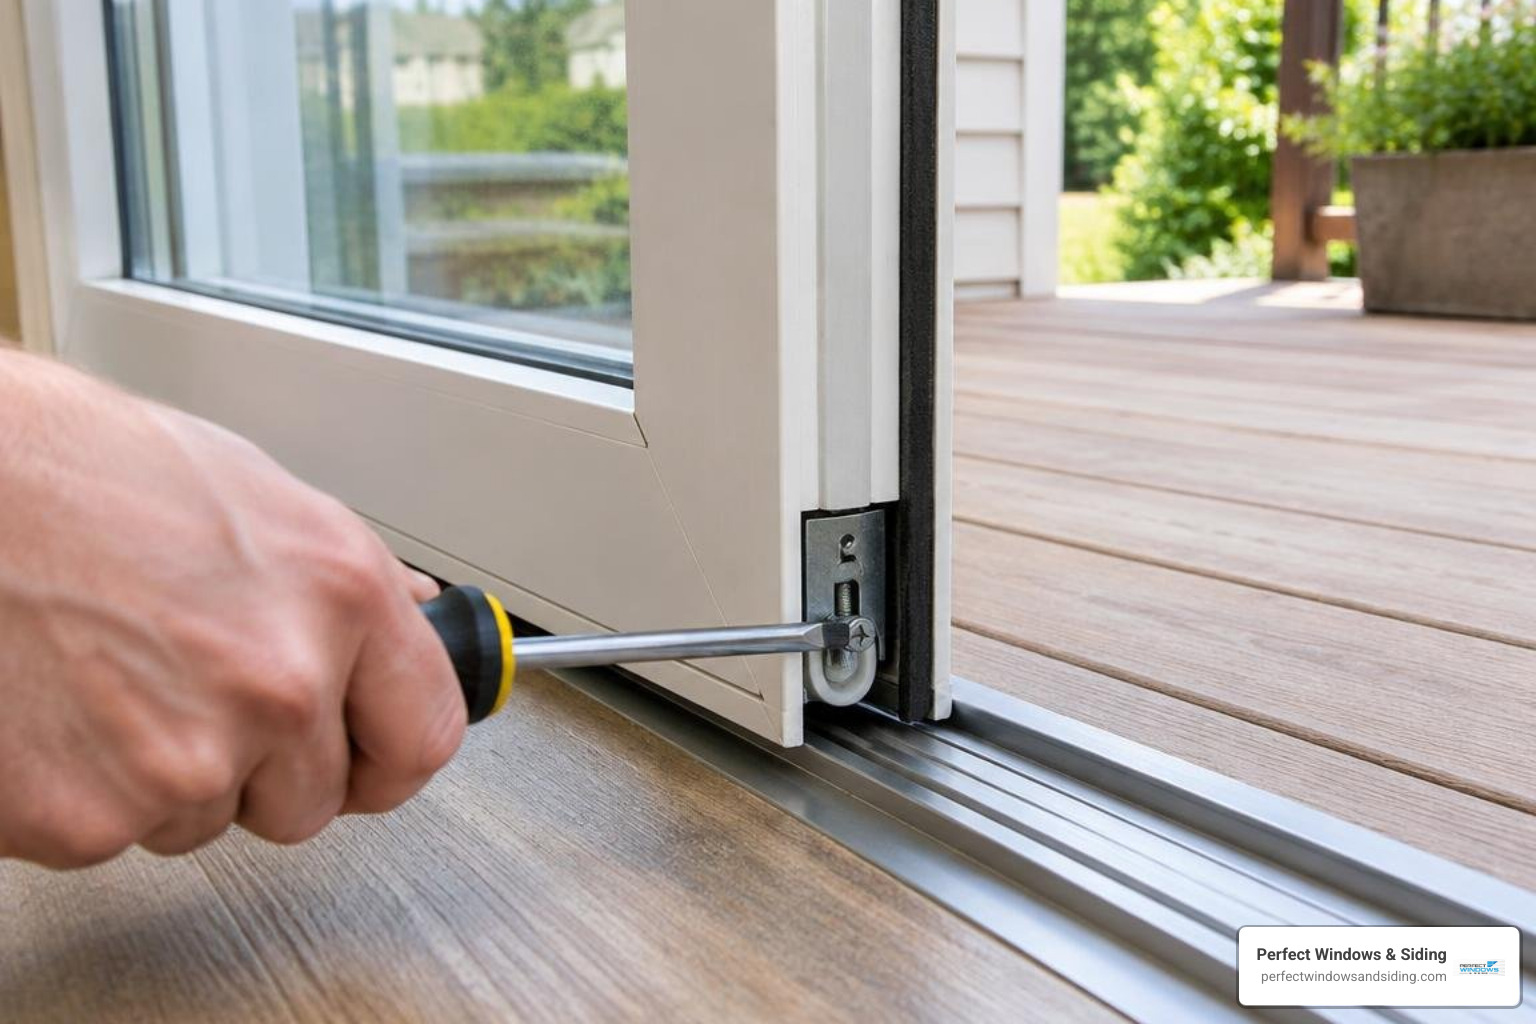
Fixing Lock Misalignment and Door Sag
Over time, daily use causes lower door rollers to settle or wear down. When a panel drops even 1/8 of an inch, the lock hook hits the bottom of the strike plate instead of sliding cleanly inside.
To resolve this issue:
- Locate Bottom Adjustment Holes: Look along the bottom edge of the operating door panel for small rubber plugs covering the roller adjustment access holes.
- Adjust Roller Height (The Gravity Fix): Insert a screwdriver into the lower access hole and turn clockwise. This raises the panel edge by roughly 1/8-inch per three full turns, lifting the mortise hook back into perfect alignment with the jamb keeper.
- Adjust Strike Plate Position: Loosen the mounting screws on the jamb keeper, adjust the plate up or down to align with the lock hook, and retighten.
- Repairing Stripped Screw Holes: If the keeper screws spin freely in the jamb, remove them, insert wooden toothpicks dipped in wood glue into the hole, trim flush, let dry, and re-drive the mounting screws for a secure hold.
If the bottom rollers are seized or flattened, read our guide on glass door roller replacement to restore smooth rolling action.
Lubrication and Preventative Care Playbook
Sliding door hardware operates in exposed outdoor environments, leaving it vulnerable to moisture, dust, and temperature shifts. Routine maintenance will keep your locking system operating smoothly:
- Use the Right Lubricant: Apply a dedicated PTFE dry-film lubricant or dry graphite to the internal mortise lock body, keyway cylinder, and latch hook. Review these professional sliding glass door lock maintenance techniques to maintain moving parts correctly.
- Never Use Standard WD-40 on Cylinders: Standard WD-40 is a solvent, not a long-term lubricant. It strips internal protective coatings and attracts dirt, pet hair, and airborne dust, eventually turning into a sticky paste that seizes internal lock pins.
- Clear the Lower Track: Vacuum grit, pet dander, and leaves from the bottom rail twice a year. Built-up track debris forces the door to bounce, jolting the internal lock components out of place.
- Check Weatherstripping: Damaged seals allow cold drafts and moisture to enter the lock pocket, leading to rust. Follow our guide to install weather stripping sliding glass door systems to protect your hardware and boost thermal insulation.
Frequently Asked Questions About Sliding Door Locks
Can I replace a sliding glass door lock myself?
Yes. Changing a standard residential sliding patio door lock is a manageable DIY job that takes under an hour. Most units use universal mortise cartridges held by simple mounting screws. As long as you carefully match the center-to-center screw spacing, backset, and stile thickness before buying your hardware, you can complete the replacement using a basic manual screwdriver.
Why does my sliding door only lock when I lift the handle?
Lifting the handle to engage the latch is a classic sign of door sag caused by worn bottom rollers or settling tracks. As the panel drops, the lock hook misaligns with the strike plate. Lifting the handle temporarily levers the door panel upward so the hook can clear the bottom lip of the keeper. You can fix this by turning the roller adjustment screws clockwise at the bottom base of the door to raise the panel back to its proper height.
Can I use WD-40 to lubricate a sticky sliding door lock?
No, you should not use standard WD-40 on sliding patio door lock cylinders or mortise cartridges. While it offers temporary relief, WD-40 leaves behind an oily residue that attracts dust, dirt, and pet hair. Over time, this buildup gums up delicate internal springs and locking pins. Instead, use a specialized dry PTFE spray or powdered graphite lubricant.
Conclusion
A sturdy, properly aligned sliding door lock is vital for home safety, energy efficiency, and smooth day-to-day operation. By identifying your hardware style, measuring carefully, and performing regular roller adjustments, you can keep your patio entrance secure and functioning like new.
If your door frame is warped, the glass is drafty, or the hardware has outlived its lifespan, explore our patio door replacement options to upgrade your home with high-performance security hardware and insulated glass.
For homeowners in Des Plaines, Park Ridge, Morton Grove, and across the Chicago suburbs, Perfect Windows & Siding provides expert exterior solutions backed by over 20 years of craftsmanship and a lifetime warranty. Discover our complete selection of custom window and patio door replacement products built to enhance comfort, security, and curb appeal.
Schedule your consultation or get a free estimate with our team today!