

Introduction
To remove broken Jeld-Wen screen door parts and take down the damaged panel, turn the corner adjustment screws counter-clockwise to retract the internal roller tension springs. Next, grasp the frame, lift the entire panel upward into the deep top track channel, and swing the bottom edge outward over the sill rail. Once the panel is removed, back out the corner mounting screws to pull out seized roller assemblies and extract broken hardware.
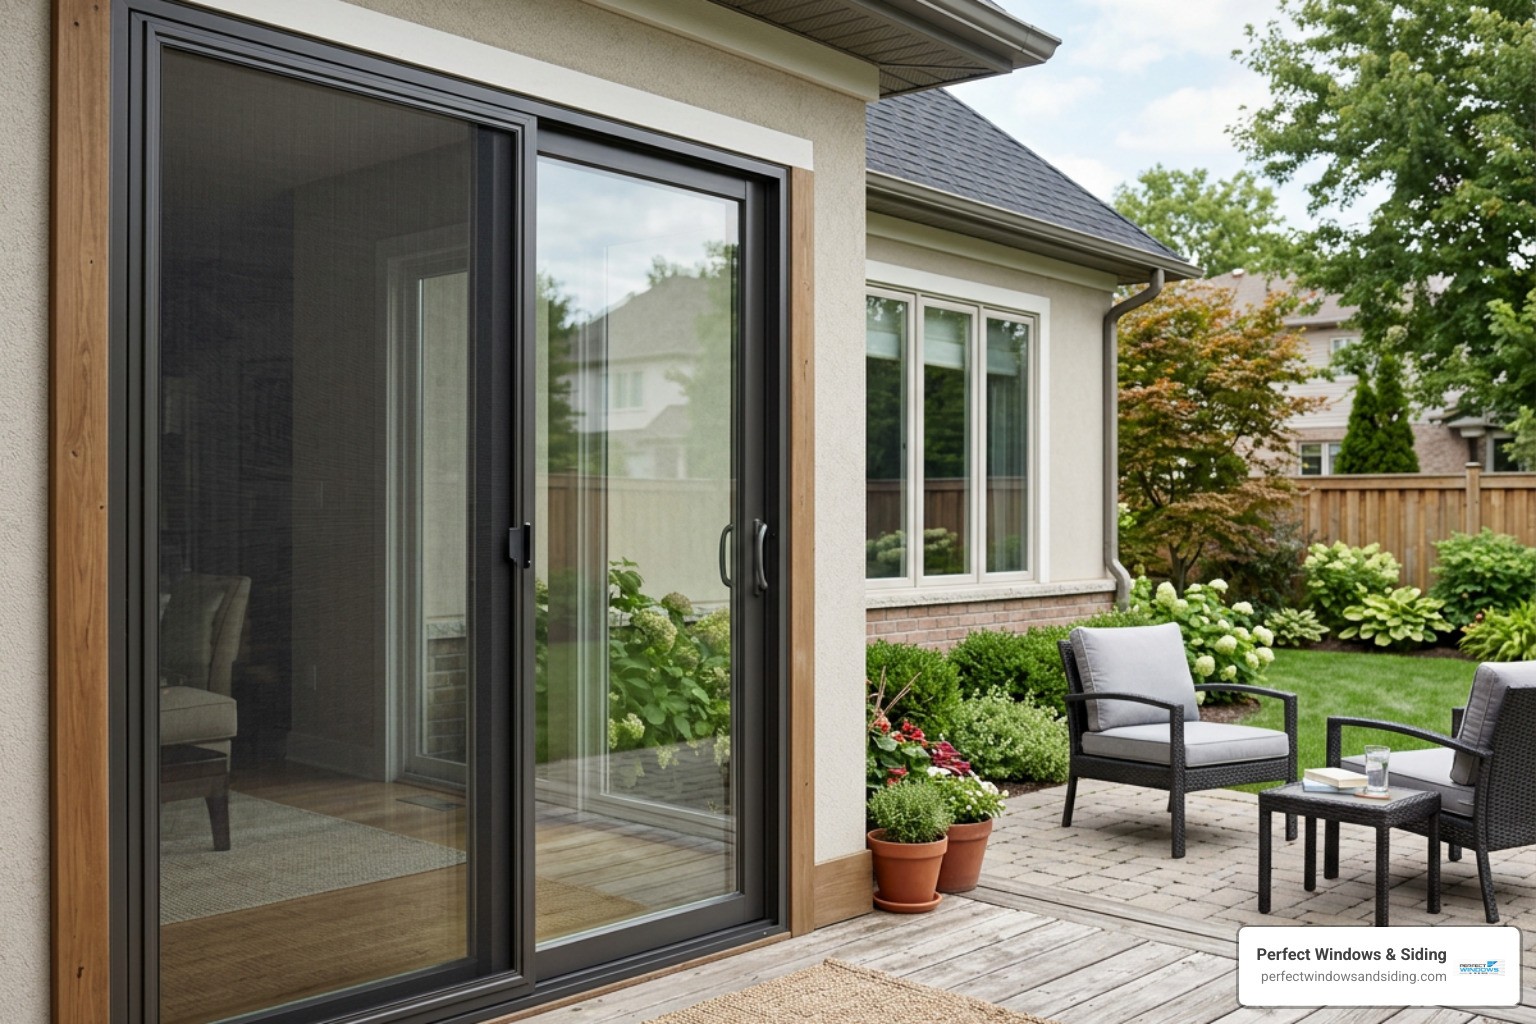
A damaged sliding insect screen can quickly turn a breezy summer evening in Chicagoland into a battle with pests. When components fail, learning how to safely remove broken components and fit a new jeld wen replacement patio screen door ensures your patio entryway stays functional, energy-efficient, and easy to use across homes in Chicago, Des Plaines, and the surrounding suburbs.
Sizing and Selecting Your Jeld Wen Replacement Patio Screen Door
Choosing the right screen requires identifying the exact specifications of your existing vinyl or wood patio door. JELD-WEN designs patio doors with precision-engineered frame profiles, meaning universal off-the-shelf screens rarely provide an airtight seal or smooth glide.
Standard vinyl sliding units come in popular factory-built net frame dimensions:
- 5-Foot Slider: Typically measures a 59.5″ x 79.5″ net frame size.
- 6-Foot Slider: Typically measures a 71.5″ x 79.5″ net frame size.
Selecting an exact match ensures that the top guide channel, bottom rollers, and side interlocking profiles align seamlessly with your existing jamb. For comprehensive details on full doorway overhauls, check our patio door replacement guide 2026 or review factory options for New & Replacement Patio Doors.
Measuring for a Jeld Wen Replacement Patio Screen Door
Accurate field measurements prevent ordering incorrect parts. To measure properly:
- Measure the Opening Width: Measure horizontally from the inside face of the side jamb screen track to the opposite side track at three points (top, middle, bottom). Use the smallest measurement.
- Measure the Opening Height: Measure vertically from the top screen track channel down to the raised sill guide track at both the left and right sides.
- Check for Square and Plumb: Measure diagonally from corner to corner across the entire frame. If the diagonal measurements differ by more than 1/8 inch, the frame is out of square, which requires shimming or track leveling before installing your new screen.
Compatible Door Series and Hardware Styles
Screen compatibility varies depending on the specific series of your patio door unit:
- Builders Series Vinyl: Standard builder-grade sliding doors featuring top-hung or bottom-rolling insect screens.
- Sierra Series: Enhanced vinyl sliding systems designed for improved structural performance and thermal efficiency.
- 400 Series Vinyl: Premium multi-chambered vinyl sliding doors engineered for longevity and superior weather protection.
Retractable screen cassettes offer a clean alternative to traditional sliding panels by rolling the mesh away when not in use. However, verify trim clearances first. Factory accessories such as brickmould adapters, flush fin adapters, stucco trim, or exterior drip caps can obstruct retractable screen housing installation. Explore custom patio screen door options if your home features non-standard casing profiles.
Tools and Materials for Replacing Broken Patio Screen Parts
Before starting your project, gather the required equipment:
- Phillips Head Screwdrivers (#1 and #2): Essential for retracting roller tension screws and adjusting door strike keepers.
- Putty Knife / Small Pry Bar: Helps gently elevate rollers over the raised sill lip without scratching vinyl or powder-coated aluminum tracks.
- Rubber Mallet: Used to seat corners and guide track assemblies without denting frames.
- Dry Silicone Lubricant: Cleans and lubricates tracks without attracting abrasive dirt or dust.
- Wood Glue and Toothpicks: Handy for restoring stripped screw mounting holes on wooden patio door frames.
- Personal Protective Equipment: Safety glasses and sturdy work gloves to protect against sharp edges and glass surfaces.
| Roller Material | Longevity | Glide Smoothness | Maintenance Requirements |
|---|---|---|---|
| Nylon Rollers | High corrosion resistance; excellent for coastal or humid zones | Whisper-quiet operation on vinyl tracks | Low maintenance; inspect for flat spots seasonally |
| Steel / Ball-Bearing Rollers | Maximum structural strength for heavy screens | Smooth, solid movement under heavy loads | Requires periodic cleaning and dry silicone spray |
Step-by-Step Guide to Removing and Installing Patio Screen Doors
Careful handling prevents accidental damage to the primary glass panels and door weatherstripping. For larger renovations involving main operating glass slabs, review our guide on fitting sliding patio doors like a pro.
Removing Damaged Panels and Screen Rollers Safely
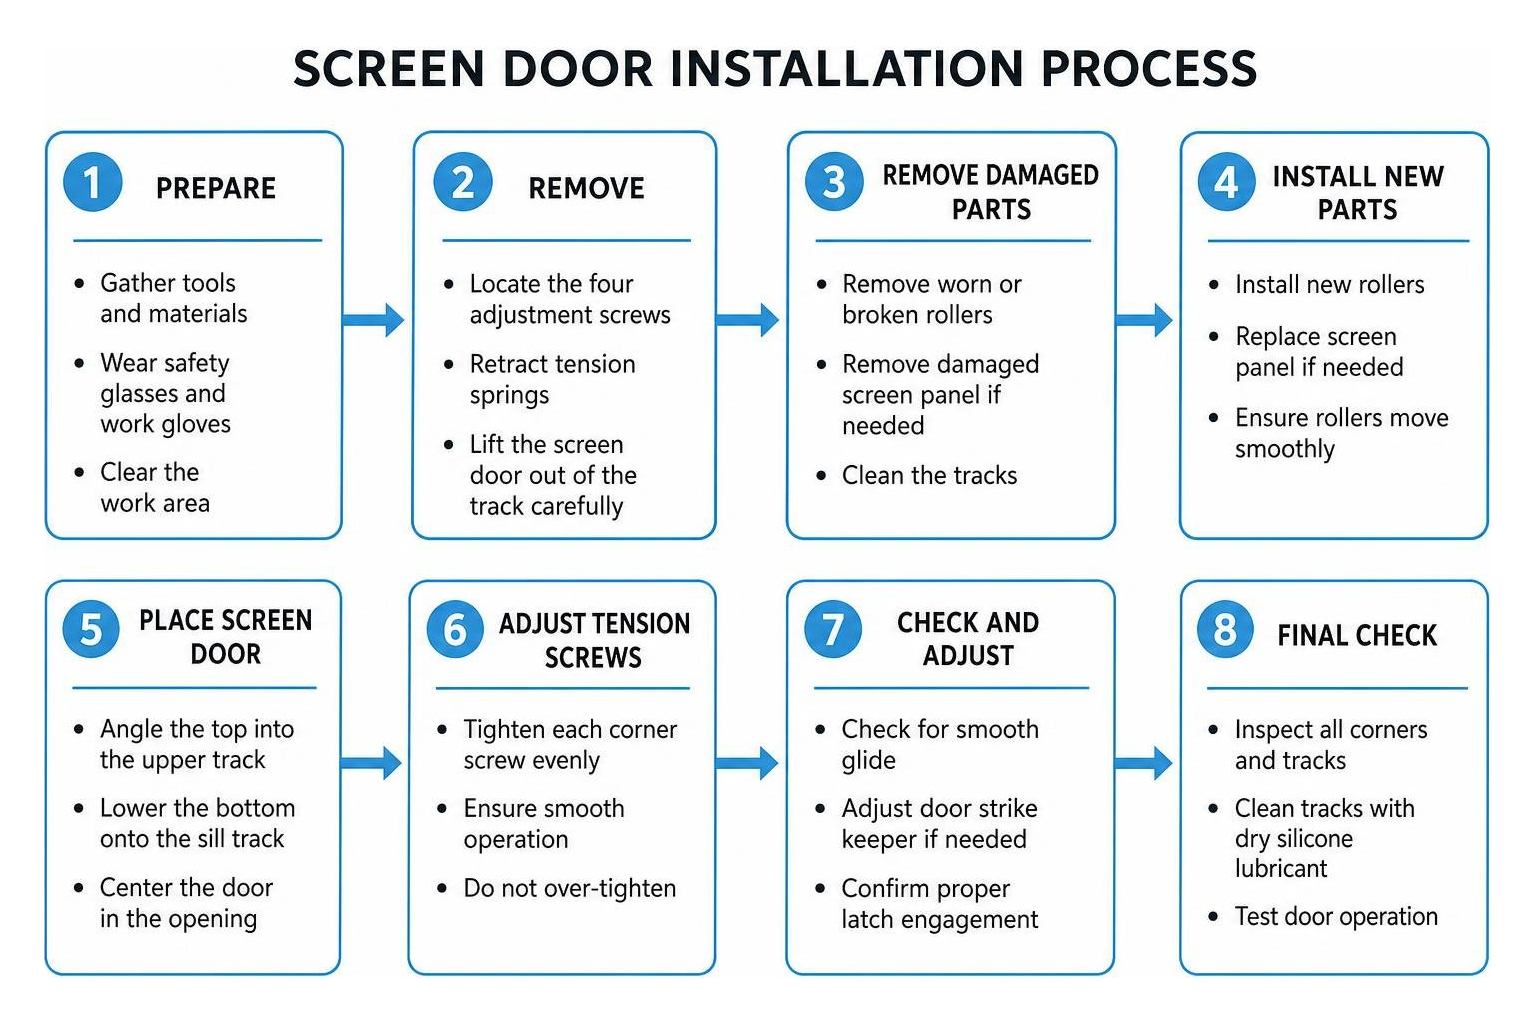
Removing an old, stuck screen door requires retracting the internal tension springs rather than forcing the unit out:
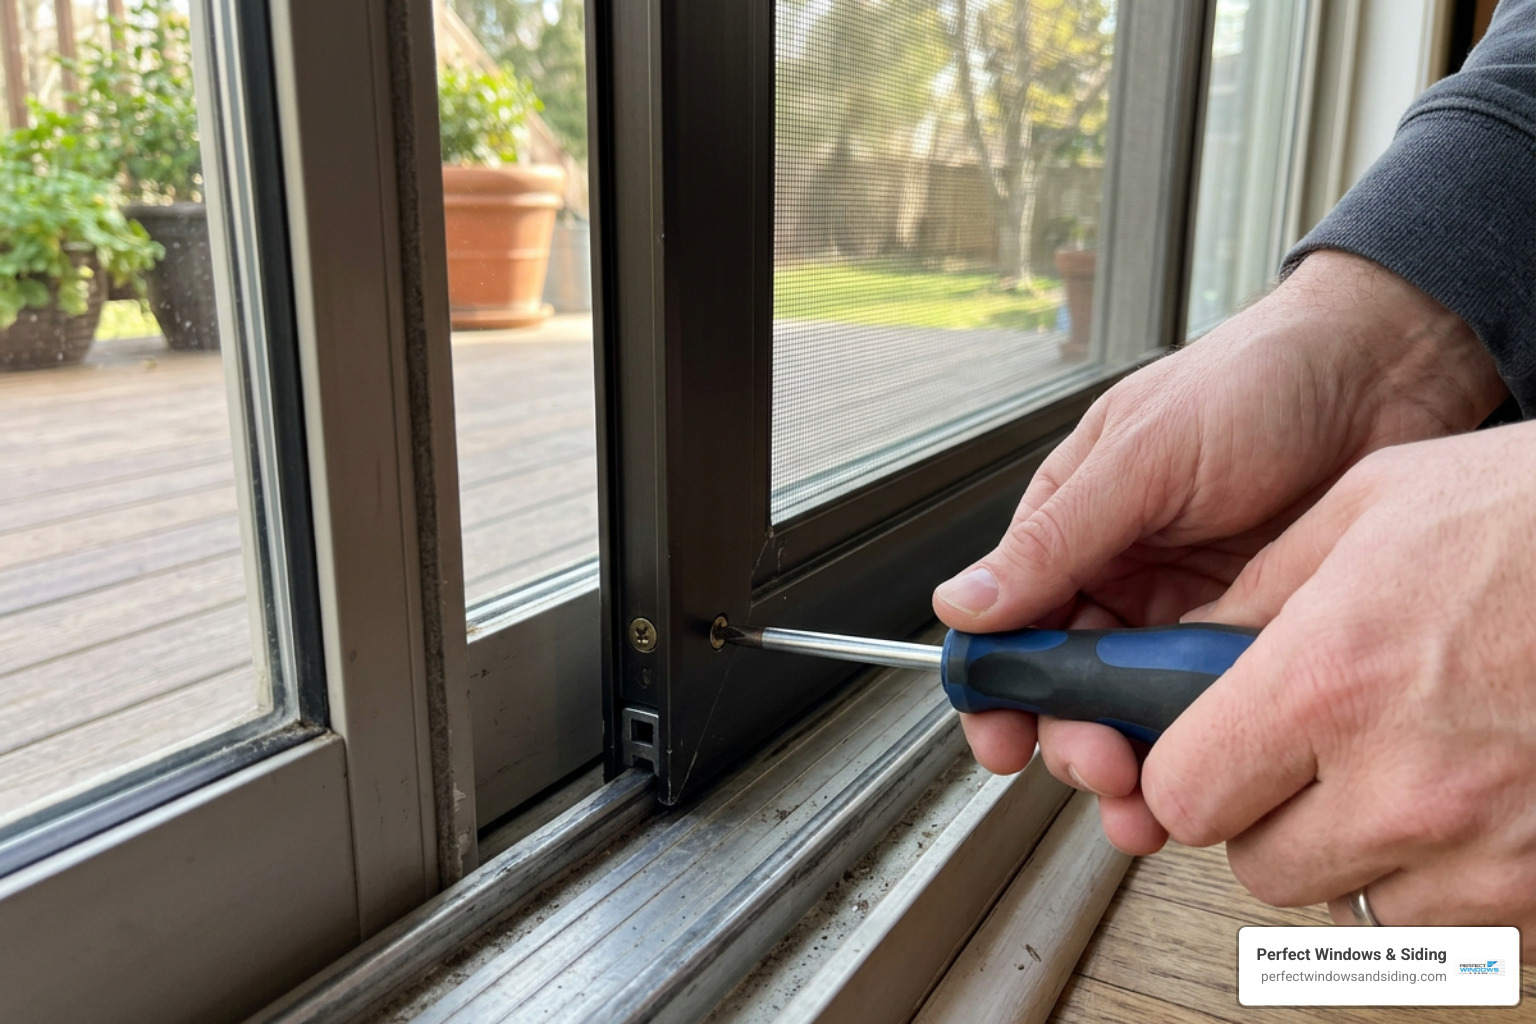
- Locate the Adjustment Screws: Find the adjustment screws located at each of the four corners (either on the outer face or along the narrow side edges of the frame).
- Retract the Rollers: Turn the bottom and top adjustment screws counter-clockwise. This pulls the internal roller wheels upward into the screen frame, creating clearance between the wheels and the track.
- Lift and Tilt: Grasp the sides of the screen frame, lift the panel upward into the deep top track channel, and swing the bottom edge outward over the sill track.
- Pry if Stuck: If older rollers are seized with dirt, slide a flat putty knife underneath the bottom roller wheels while lifting to ease them over the track edge.
- Fix Stripped Holes: If wood mounting screws are stripped, insert wooden toothpicks dipped in wood glue into the hole, let it cure, trim flush, and drill a fresh pilot hole.
How to Install a Jeld Wen Replacement Patio Screen Door
Installing a new factory replacement screen restores smooth glide and weather protection:
- Clean the Track: Vacuum all dirt, debris, and seasonal grime from the bottom sill track and wipe it with a damp cloth.
- Insert into the Top Channel: Hold the new screen door with the exterior face oriented outward. Push the top rail straight up into the deep upper screen track channel.
- Seat the Bottom Rollers: Lift the bottom of the screen upward until the lower rollers clear the raised sill rail, then set the wheels directly onto the track.
- Confirm Alignment: Verify the side interlock profile engages cleanly with the door jamb bumper when sliding the panel closed, following guidelines from the JELD-WEN JII030 Retractable Patio Door Screens User Manual.
Adjusting Screen Rollers for Smooth Operation
Proper calibration ensures your screen operates effortlessly and locks securely:
- Adjust Wheel Height: Using a screwdriver, turn the bottom corner adjustment screws clockwise in quarter-turn increments to raise the screen. The door should sit high enough to glide freely without dragging on the lower sill, but low enough that the top guide stays retained in the upper channel. Learn more about fine-tuning hardware in our diy sliding door roller replacement walkthrough.
- Hide the Weatherstripping: Adjust both sides evenly so the vertical edge of the screen sits perfectly plumb against the side jamb, keeping the bug-seal weatherstrip hidden behind the frame.
- Align the Latch Mechanism: Test the locking lever. If the latch hook fails to catch the strike plate, turn the center face screw clockwise to extend the hook or counter-clockwise to shorten it until it clicks securely into place.
Frequently Asked Questions About Jeld-Wen Screen Doors
How do you fix a sliding screen door that will not slide smoothly?
A sticking screen door is usually caused by accumulated track debris, misaligned roller heights, or seized roller bearings. Begin by vacuuming and wiping down the entire lower sill track. Apply a dry silicone spray lubricant—avoid oil-based lubricants like WD-40, which attract dust and grime. If the screen still drags, adjust the corner roller screws clockwise in quarter-turn increments to raise the panel off the bottom track rail.
Are retractable screens compatible with all vinyl sliding patio doors?
JELD-WEN retractable screens are engineered specifically for Builders, Sierra, and 400 Series vinyl patio doors. However, they cannot be installed on units with specific exterior casing modifications, such as stucco trim flanges, flush fin adapters, brickmould adapters, or protruding drip caps. Insect screens are designed solely for insect protection and ventilation; they do not serve as safety barriers for pets or young children.
How long does it take to replace a sliding patio screen door?
Replacing a standard sliding insect screen generally takes about 30 minutes for experienced installers and approximately one hour for a first-time DIYer. Having the proper Phillips screwdrivers, a putty knife, and safety equipment ready beforehand helps ensure a smooth, trouble-free installation.
Conclusion
Keeping your sliding patio screens in top condition ensures comfortable seasonal ventilation, dependable insect defense, and effortless operation. When roller assemblies corrode, frames warp, or sill tracks wear down, replacing damaged components restores that factory-smooth glide.
For homeowners in Chicago, Des Plaines, Park Ridge, Morton Grove, and across the surrounding suburbs, our team at Perfect Windows & Siding brings over 20 years of dedicated craftsmanship and licensed, insured expertise to every project. Whether you need custom hardware adjustments, full frame alignment, or high-performance sliding patio doors backed by lifetime warranty coverage, we are here to help.
Schedule your consultation today for custom professional patio door and window replacement solutions tailored to your home.