

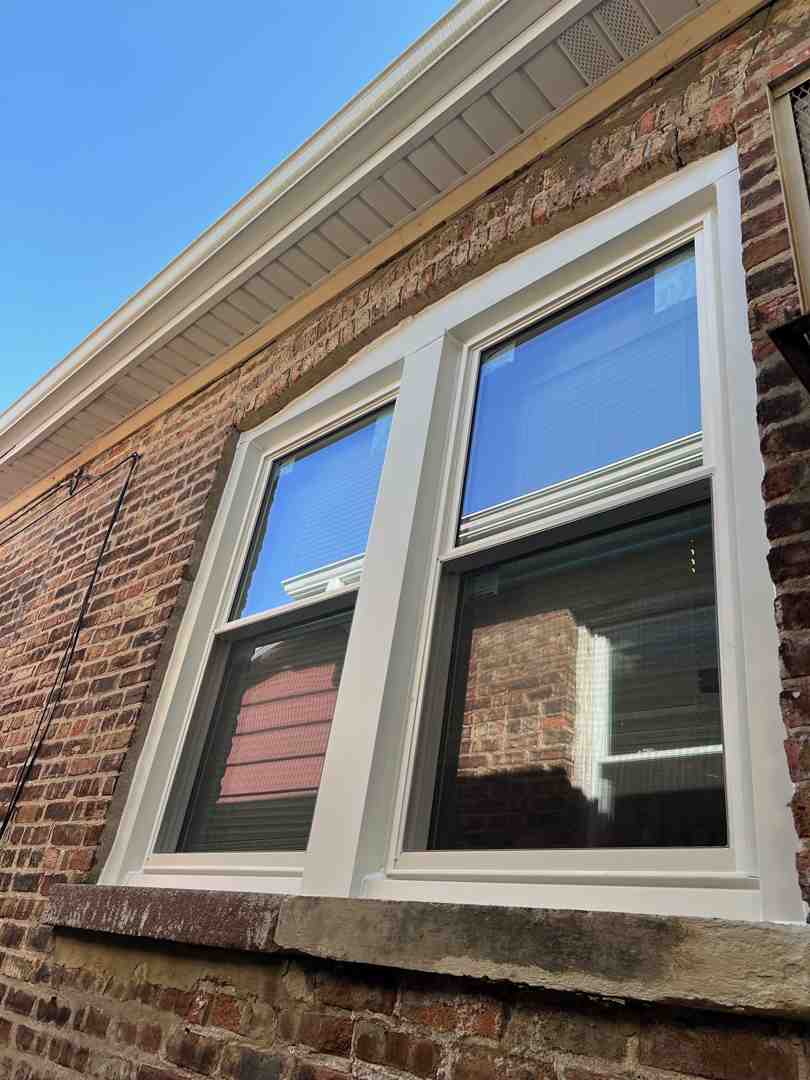
Safe, Leak-Resistant Window Installation in Double Brick Walls
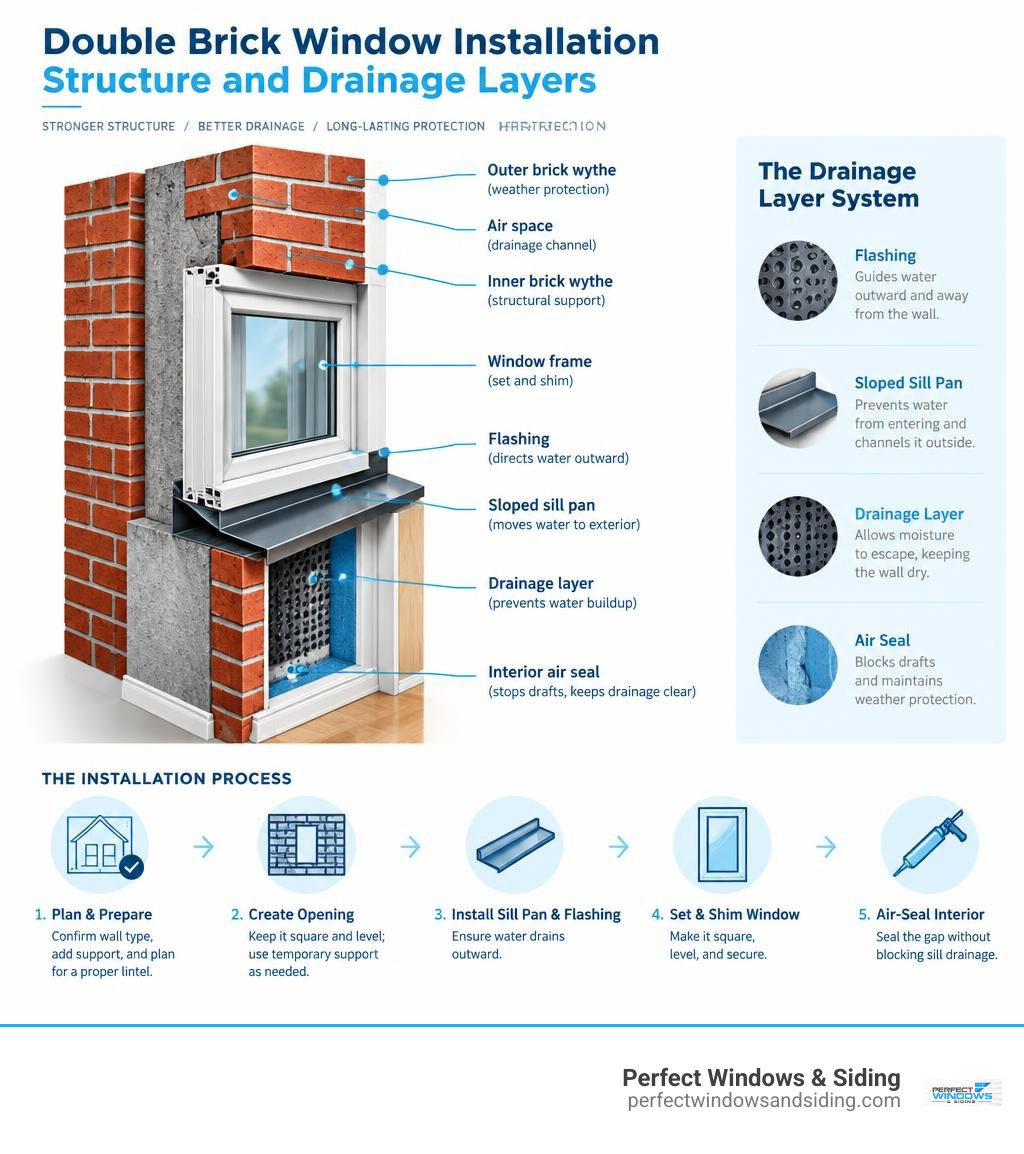
Installing a new window in a double brick wall starts with confirming the wall type, supporting the masonry, and building drainage before the window goes in. For a new or enlarged opening, do not cut brick until a properly sized lintel and temporary support plan are in place. Then prepare a square, level opening; install a sloped sill pan and flashing that directs water outward; set and shim the window; and air-seal the interior gap without blocking sill drainage.
Double brick is often structural masonry, not a cosmetic outer layer. A square foot can weigh about 80 pounds, so removing brick for even one large opening can mean removing more than a ton of supported wall. This is why Chicago-area projects that alter an opening commonly need permits and structural engineering approval.
I’m Voytek Glab, owner of Perfect Windows & Siding, with more than 20 years of hands-on carpentry and exterior remodeling experience in the Chicago suburbs. I’ve helped homeowners make informed decisions about installing new window in double brick wall assemblies with a focus on safe structure, careful fit, and long-term weather protection.
Identifying Solid Double Brick vs. Brick Veneer
Before touching a masonry saw or ordering replacement units, you must determine whether your home is built from solid double-wythe masonry or wood framing with a single brick veneer. In communities like Des Plaines, Park Ridge, and Morton Grove, older homes frequently feature solid double-wythe brick walls where both courses of brick support the roof and floor loads.
Misidentifying the wall construction will lead to structural hazards and improper moisture management. Review the characteristics below:
| Feature | Solid Double-Wythe Brick | Brick Veneer |
|---|---|---|
| Structural Role | Both brick wythes carry building and roof loads | Wood or steel stud framing carries all loads |
| Bonding Pattern | Includes header courses (bricks turned end-out every 5-6 rows) | Continuous running bond with no structural header bricks |
| Wall Thickness | Typically 8 inches to 12 inches deep | Typically 4 inches of brick plus a 1-inch air cavity |
| Weep Holes | Rare in historic builds; moisture breathes through masonry | Standard weep holes along bottom courses and above windows |
| Window Sill Depth | Deep masonry returns (often 6+ inches inside or outside) | Shallow exterior sill depth (2 to 4 inches) |
To confirm your wall construction, apply three simple field tests:
- The Header Course Check: Look closely at the exterior brick pattern. If you see a row where the small ends of the bricks face outward every five to seven courses, these are structural header ties tying two wythes together.
- The Deep Sill Inspection: Measure the overall wall thickness at an existing opening. A wall depth exceeding 8 inches with plaster directly applied over masonry or light furring strips indicates solid double brick. Reviewing proper window measuring techniques will help you accurately gauge opening dimensions and wall thickness.
- Weep Hole Identification: Check the base course near the foundation. Traditional brick veneer incorporates clear weep holes and open joints every 24 inches to drain its interior cavity.
Structural Engineering for Installing New Window in Double Brick Wall Openings
Cutting into double brick masonry is a major structural alteration. A single square foot of double-brick wall weighs roughly 80 pounds. Cutting a new rough opening for an expansive living room window or an egress window installation can easily remove over a ton of structural masonry.
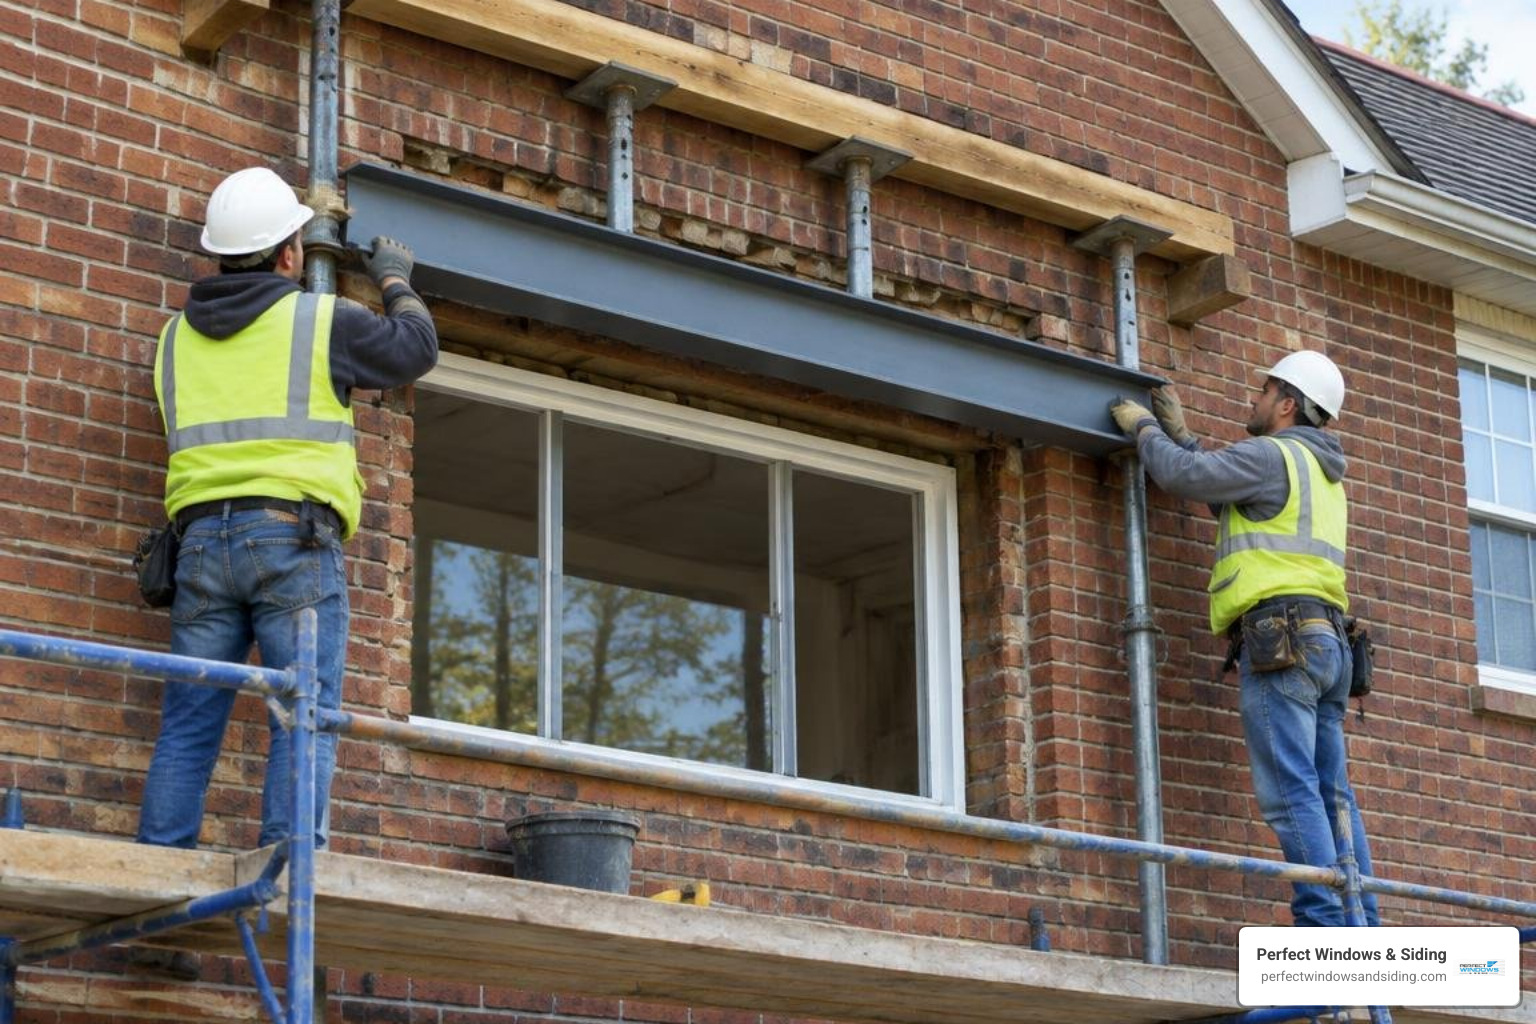
When an opening is created, the downward compression load from upper brick courses, ceiling joists, and roof trusses must be redistributed safely around the void. Proven methods prioritize the bearing rule and lintel integration.
Critical structural rules include:
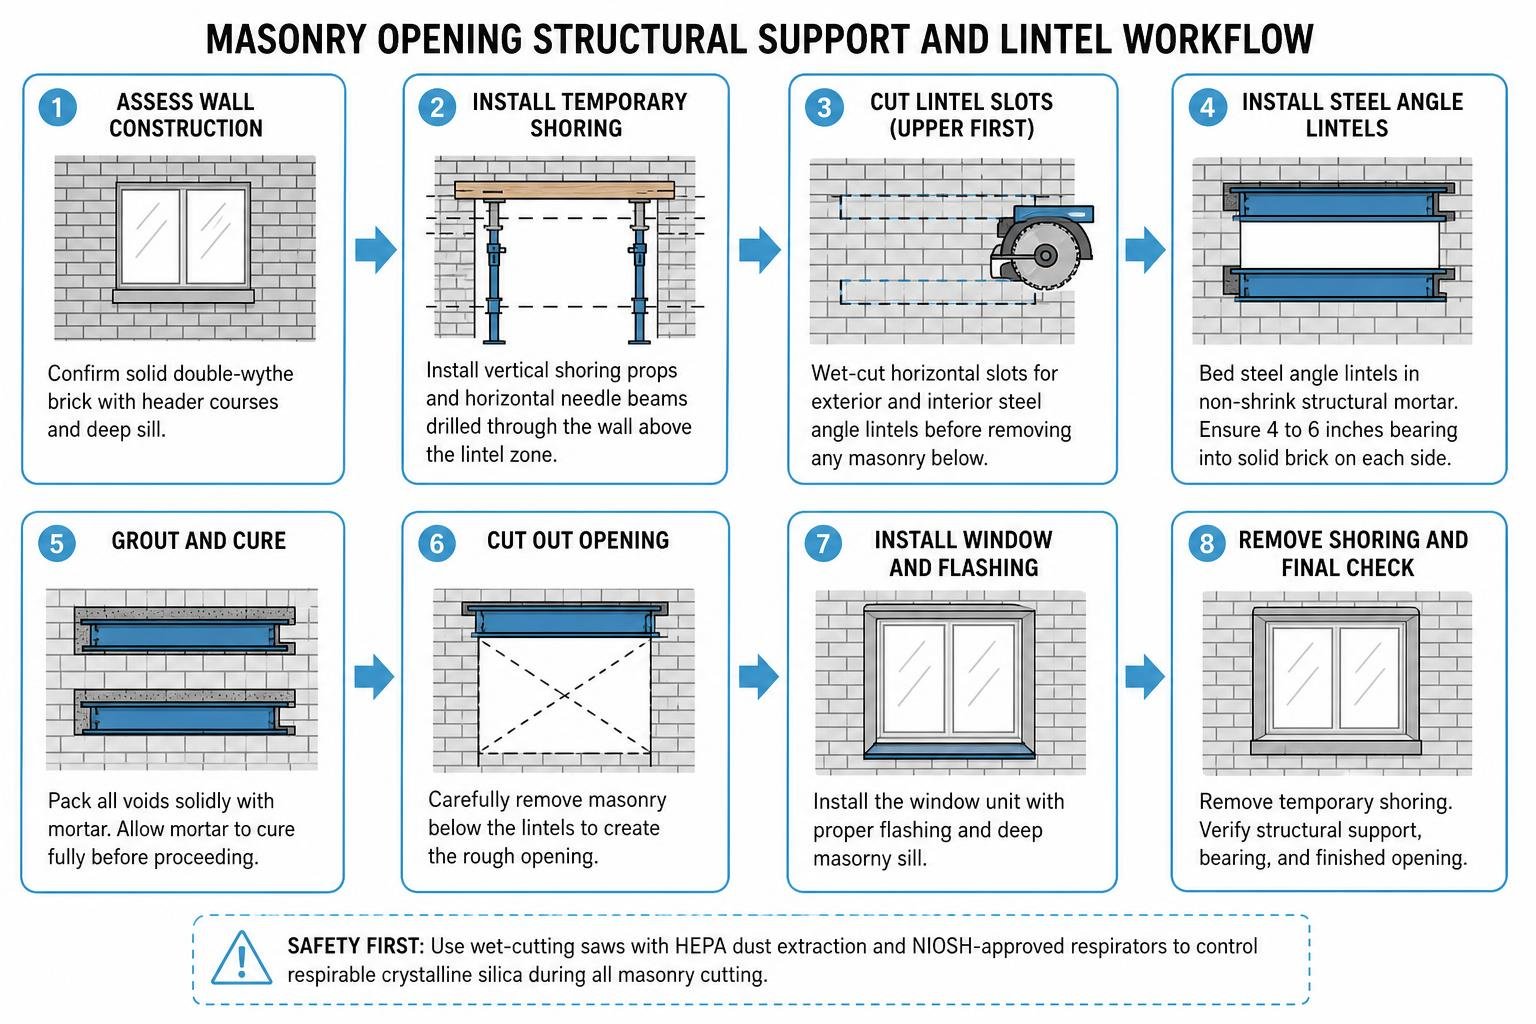
- The 4-to-6-Inch Bearing Rule: Any steel angle lintel installed must extend a minimum of 4 to 6 inches into the solid, undisturbed brickwork on both sides of the rough opening. This bearing area transfers overhead compression loads without crushing the jamb bricks.
- Temporary Shoring with Needle Beams: You must never cut the rough opening before the masonry above is safely supported. Install temporary vertical shoring props and horizontal needle beams drilled through the wall above the lintel zone to carry ceiling and masonry loads during cutting.
- Lintel Placement and Grouting: Cut the upper horizontal slot for the exterior and interior steel angle lintels first. Bed the lintels in non-shrink structural mortar, pack all voids solidly, and allow the mortar to cure fully before cutting the wall below.
- OSHA Silica Dust Safety: Masonry cutting produces high levels of respirable crystalline silica. Always use wet-cutting diamond saws connected to industrial HEPA dust extractors alongside NIOSH-approved respirators to ensure jobsite safety.
For complex transformations, reviewing Fine Homebuilding replacement window techniques confirms how load paths and support hardware maintain masonry stability across large wall spans.
Rough Opening Preparation and Flashing Best Practices
Once the lintel is fully cured and bearing load, cut the masonry opening using a continuous-rim diamond wet saw. Precision is non-negotiable: the maximum allowable deviation for a rough opening in a brick wall is 1/8 inch for plumb and level.
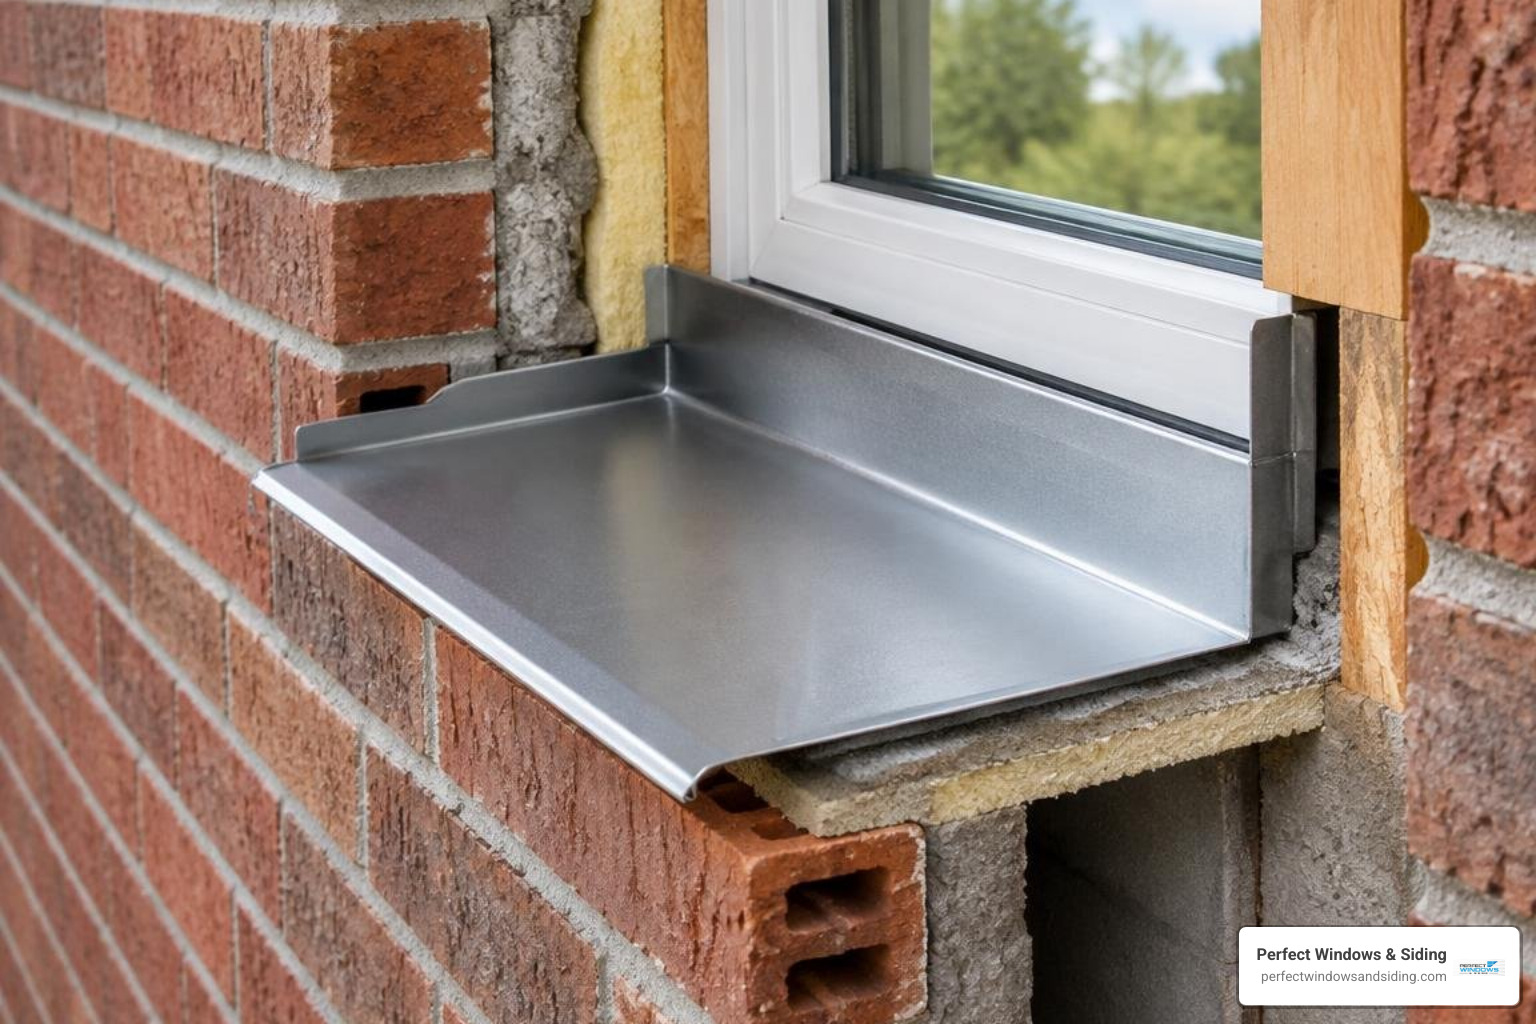
Rough Opening Prep When Installing New Window in Double Brick Wall Framing
Double brick walls require a stable mounting framework inside the masonry void. Fastening window frames directly into uneven brick joints invites drafts, frame warping, and water entry.
- Treated Wood Bucks: Anchor pressure-treated 2x wood bucks into the masonry jambs and head using countersunk masonry anchors. These bucks provide a square, continuous nailing and fastening substrate.
- Mortar Joint Inspection: Chip away any loose or deteriorated mortar in the brick jambs. Repoint weak spots with structural masonry repair mortar to give fasteners solid purchase.
- Diagonal Squareness Checks: Measure corner-to-corner diagonally across the rough opening. The two diagonal dimensions must match within 1/8 inch to ensure smooth window operation. Follow our comprehensive full-frame window installation guide to set framing true.
Creating the Sill Pan and Exterior Flashing System
Water will inevitably penetrate exterior brick surfaces during severe Midwestern rainstorms. Managing this moisture through a dedicated drainage plane is vital:
- Beveled Masonry Sub-Sill: Ensure the brick sill base slopes downward toward the exterior at a minimum pitch of 1/4 inch per foot.
- Flexible Membrane Sill Pan: Form a continuous sill pan using self-adhering, peel-and-stick flashing membrane. Run the membrane across the rough sill, extending it at least 2 inches up each side jamb to form watertight end dams.
- Mechanical Back Dam: Install a 3/8-inch to 1/2-inch rigid back dam at the interior edge of the sill framing before laying the membrane. This positive physical stop prevents wind-driven water from traveling inward.
- Head Flashing and Storm Flap: Position metal head flashing over the exterior steel lintel. Integrate a self-adhering flashing storm flap over the vertical leg of the metal to route drainage out past the exterior brick face.
Window Unit Placement and Air-Sealing
Choosing the correct window profile depends on your framing plan. Replacement projects in solid masonry often use finless block frame windows fastened directly through the jambs into the structural buck, whereas new builds or full-envelope alterations may incorporate flanged units.
Execution Steps for Installing New Window in Double Brick Wall Assemblies
Proper installation balances secure mechanical fastening with movement allowances, mirroring established weatherproofing techniques for masonry windows.
- Dry-Fit Verification: Place the window unit into the prepared rough opening without sealant to verify clearance. You should have a uniform 1/4-inch to 3/8-inch expansion gap around the perimeter.
- Non-Compressible Shims: Set heavy-duty composite shims under the window side jambs and at midpoint anchor locations. Avoid standard wood shims, which compress and rot when exposed to damp masonry environments.
- Fastener Spacing: Secure the block frame through pre-drilled jamb holes into the wood buck or masonry core using 1-1/4-inch corrosion-resistant pan-head screws or structural masonry fasteners. Space fasteners no more than 12 inches to 16 inches on center. In high wind zones (over 120 mph), local building codes may require fastening every 8 inches or in every flange slot.
- Plumb, Level, and Square Checks: Continually verify that the frame shows no diagonal rack or inward bow. If you are handling window components yourself, reference core DIY window installation principles to prevent frame twisting.
Interior Air-Sealing and Thermal Insulation
Masonry conducts cold temperatures rapidly during Chicago winters. Creating a continuous thermal and air barrier prevents indoor humidity from condensing on cold masonry surfaces:
- Closed-Cell Backer Rod: Insert closed-cell foam backer rod into the perimeter joint around the exterior frame. The backer rod should be approximately 1/8 inch wider than the gap to provide adequate compression.
- Low-Expansion Polyurethane Foam: From the interior, inject low-pressure, low-expansion polyurethane window and door foam into the void between the frame and the buck. Avoid standard expanding foams, which generate enough pressure to bow vinyl or aluminum frames.
- Perimeter Sealant Bead: Apply a continuous bead of high-performance polyurethane or hybrid polymer sealant over the exterior backer rod, tooling the joint smooth for a durable seal.
- Interior Trim and Vapor Seal: Install interior extension jambs and trim casing, sealing all interior perimeter joints with paintable elastomeric sealant to complete the air barrier.
Common Mistakes to Avoid in Masonry Window Projects
A properly installed full-frame replacement window in a brick wall should perform for 20 to 30 years without leaks if the drainage plane remains clear and the flashings maintain their seal. Avoid these critical mistakes, which frequently lead to the top window replacement errors seen across the industry:
- Caulking the Exterior Bottom Flange or Weep Slots: Never seal the bottom exterior edge of the window frame or cover the sill pan weeps. Trapping water inside the sill assembly rots interior framing and pushes moisture into the brickwork.
- Omitting the Overhead Steel Lintel: Removing masonry without installing a certified, load-bearing steel lintel causes brick courses to sag, cracking glass panes and jamming window sashes.
- Insufficient Lintel End Bearing: Resting a lintel on less than 4 inches of solid masonry risks crushing the support bricks under high roof and wall loads.
- Direct Mortar-to-Frame Contact: Never pour wet mortar directly against vinyl or aluminum window frames. Brick expands and contracts at different rates than window frames; rigid contact causes frame distortion and seal failure.
- Using High-Pressure Expanding Foam: Standard expanding spray foams exert excessive force upon curing, bowing side jambs and preventing sashes from sliding or locking properly.
Frequently Asked Questions About Masonry Window Installations
Do I need a building permit or engineering sign-off to add a window in a double brick wall?
Yes. Creating a new opening or enlarging an existing one in a load-bearing double brick wall alters the structural envelope of your home. Municipalities across the Chicago area require a building permit and often request structural engineer drawings detailing lintel dimensions, bearing calculations, and temporary shoring plans to guarantee building safety.
What fasteners and sealants work best for double brick installations?
Use corrosion-resistant masonry screws (such as Tapcon fasteners) or heavy-duty structural wood screws driven directly into pressure-treated mounting bucks. For exterior joints, use a 1-part elastomeric polyurethane or advanced polymer sealant (such as Sikaflex or OSI QUAD MAX). These sealants provide superior flexibility, adhere strongly to masonry, and resist UV degradation over decades of temperature swings.
Why must the bottom exterior window flange remain uncaulked?
The bottom exterior flange must remain open to allow incidental moisture that reaches the sill pan to escape via gravity. Sealing the bottom joint traps water inside the wall assembly, rotting wood bucks and driving moisture into indoor plaster or drywall.
Conclusion
Installing a new window in a double brick wall requires precise structural calculations, specialized masonry cutting tools, and a reliable multi-tiered flashing strategy. When done with care, your new installation preserves the home’s structural integrity while delivering exceptional draft protection, enhanced security, and improved comfort across all seasons.
With over 20 years of exterior remodeling experience serving homeowners throughout Des Plaines, Park Ridge, Morton Grove, and the greater Chicago area, our licensed and insured team brings exacting craftsmanship and lifetime warranty protection to every project. Whether you are planning a full-frame upgrade or exploring custom bay window installations in Park Ridge, we are here to help.
Schedule your consultation or get a free estimate with Perfect Windows & Siding today for expert structural evaluations and flawless window installations.