

Why Weather Stripping Your Door Matters
Have you ever felt that mysterious chill near your front door on a windy Chicago day? That’s your home literally leaking money through invisible gaps. Let me share something that surprises most homeowners: even a tiny 1/8-inch gap around a standard door creates the equivalent of a 5½-inch hole straight through your wall!
When you install door weather stripping properly, you’re not just blocking drafts – you’re plugging an energy drain that could be costing you up to 20% of your annual heating and cooling expenses. The U.S. Department of Energy confirms these savings, making this simple upgrade one of the most cost-effective home improvements available.
Here in Chicagoland, weather stripping isn’t just a winter comfort issue. It’s year-round protection that serves multiple purposes. Beyond the obvious energy savings, proper door sealing creates a barrier against unwanted pests looking for warm shelter, reduces street noise that disrupts your peace, and prevents moisture from damaging your valuable door frames.
Install door weather stripping in four straightforward steps that typically take just an hour of your Saturday:
- Remove old weather stripping by carefully prying it away and thoroughly cleaning the surface
- Measure carefully, adding 10% extra length to avoid coming up short
- Cut new strips to size using scissors for foam/vinyl materials or tin snips for metal options
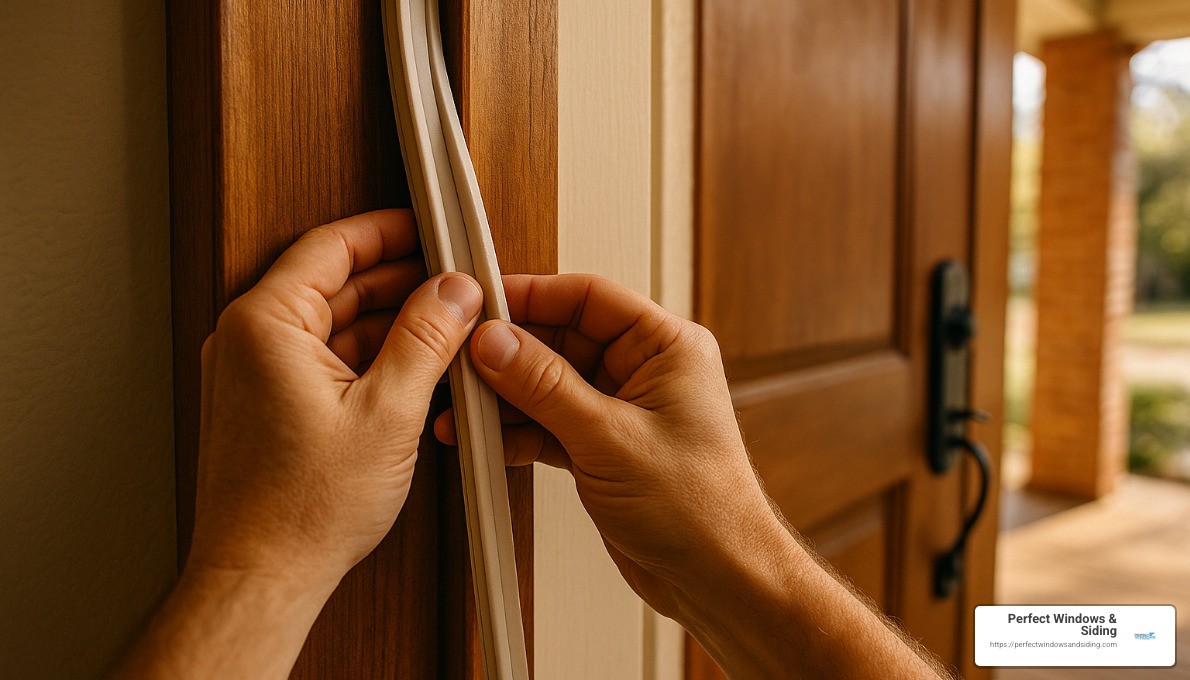
- Install properly against the jamb using the adhesive backing or secure with screws (never nails)
I’m Voytek Glab, owner of Perfect Windows and Siding, and after 25 years of helping Chicago homeowners weatherize their homes, I’ve personally seen thousands of doors transformed from energy wasters to efficiency champions. The immediate difference is something you can actually feel – no more mysterious drafts swirling around your ankles or temperature drops near doorways.

Unlike caulking, which creates a permanent seal, weather stripping provides a flexible, replaceable barrier that maintains its effectiveness while allowing your door to function normally. It offers superior insulation value and, when professionally installed, even improves your home’s curb appeal by eliminating unsightly gaps.
The science behind door sealing is compelling. According to research from the Department of Energy, proper weather stripping ranks among the top energy-efficiency improvements with the fastest payback periods – often recouping your investment within a single heating season here in Chicago.
Why Door Weather Stripping Is Crucial
When I talk with Chicago homeowners about energy efficiency, I often see their eyes widen when they learn just how much those invisible drafts around their doors are actually costing them. That cool breeze you feel by your front door isn’t just making you uncomfortable—it’s literally pulling money right out of your wallet with every gust.
The U.S. Department of Energy has found that properly install door weather stripping and sealing those sneaky gaps can save up to 20% on your annual energy bills. That’s real money back in your pocket, especially when you consider the wild temperature swings we experience here in Illinois.

But saving on your energy bill is just the beginning of what makes weather stripping so important. Let me share what my customers find after we finish their door sealing projects:
Protection Against the Elements
Chicago winters don’t mess around—with bitter winds, driving snow, and bone-chilling temperatures. Then summer hits with its sticky humidity and sudden downpours. Your weather stripping creates a crucial barrier against these harsh elements, preventing moisture from sneaking in and damaging your door frame, warping your beautiful hardwood floors, or staining your interior walls over time.
Pest Prevention
Have you ever wondered how those tiny ants find their way inside? Even a 1/8-inch gap—which might seem insignificant—provides an open invitation for insects and other pests. When you install door weather stripping correctly, you eliminate these entry points, keeping unwanted six-legged guests outside where they belong.
Sound Reduction
Many of my customers in busier Chicago neighborhoods are pleasantly surprised by how much quieter their homes become after we seal their doors. The same materials that block air movement also dampen sound waves, reducing street noise, barking dogs, and that neighbor who starts their motorcycle at 6 AM.
Improved Indoor Air Quality
Weather stripping helps maintain your home’s clean air by preventing dust, pollen, and urban pollutants from entering through door gaps. This is especially important for family members with allergies or respiratory sensitivities.
Brian Gregory, a weatherization expert I’ve worked with for years, puts it perfectly: “This is a smart home project we’ll assist you with every step of the way. The doors in your home often leak air, even when closed. Proper weather stripping can dramatically change how your home feels and performs.”
Weather Stripping vs. Caulking: What’s the Difference?
I’m often asked whether caulking would work instead of weather stripping. They actually serve different purposes:
- Weather stripping is designed specifically for movable components like doors and operable windows
- Caulking works best for stationary cracks and fixed joints
For complete protection, you often need both. While we’re focusing on weather stripping in this guide, don’t overlook the importance of proper caulking around your door frame’s exterior.
One of my customers from Chicago’s North Side recently told me: “It’s amazing how different our home feels – warmer, brighter, and more comfortable after properly sealing our doors. I wish we’d done it years ago!”
The scientific research on energy-efficiency backs up everything my customers experience. That tiny 1/8-inch gap around a standard door equals having a 5-inch hole in your wall! Imagine trying to heat your home with that kind of opening. By taking a little time to install door weather stripping, you’re making a smart investment in your home’s comfort, efficiency, and protection.
Choose & Prepare: Materials, Tools, Door Inspection
Before you roll up your sleeves to install door weather stripping, let’s make sure you’re properly prepared. The right materials, tools, and a thorough door inspection will make all the difference between a drafty disappointment and a cozy, energy-efficient success.
Selecting the Right Weather Stripping Material
Walking down the weather stripping aisle can feel overwhelming, but I’m here to help you steer the options. Your choice should reflect your door type, our wild Chicago climate, and your budget:
| Material Type | Durability | Cost | Best For | Advantages | Disadvantages |
|---|---|---|---|---|---|
| Foam Tape | 1-2 years | $ | Low-traffic doors, quick fixes | Easy installation, inexpensive | Wears quickly, less effective seal |
| Vinyl | 3-5 years | $$ | Most residential doors | Water-resistant, flexible, moderate durability | Can stiffen in extreme cold |
| Rubber | 5+ years | $$ | Exterior doors | Excellent compression, weather-resistant | More difficult to install |
| Silicone | 5-10 years | $$$ | All doors, especially in extreme climates | Superior flexibility, temperature resistance | Higher cost, may require special installation |
| Metal (bronze, aluminum) | 10+ years | $$$$ | Historic homes, long-term solutions | Extremely durable, traditional appearance | Most expensive, hardest to install |
For most Chicagoland homes, I recommend high-quality vinyl or silicone weather stripping for exterior doors. These materials stand up admirably to our roller-coaster temperatures while maintaining a tight seal.
As my colleague Tom likes to say, “Silicone is worth every penny because it stays flexible when January throws -10° at your door, but won’t melt when August hits 95°.” Hard to argue with that wisdom!
Special Types of Weather Stripping
Beyond the basic materials, you might encounter some specialty types:
Kerf-style weather stripping slides into a pre-cut groove in your door jamb, creating a clean, nearly invisible seal. V-strip or tension seals create a spring-loaded barrier that compresses when the door closes – perfect for uneven gaps. If you have a steel door, magnetic weather stripping creates an impressive airtight seal similar to your refrigerator door.
Don’t forget about door sweeps and thresholds – these tackle the often-overlooked gap at the bottom of your door where cold air loves to sneak in. In Chicago’s snowy winters, a good door sweep is worth its weight in gold!
Essential Tools for Installation
Before you install door weather stripping, gather these tools for a smooth project:
Tape measure, utility knife or scissors, screwdriver (both flathead and Phillips), hammer, putty knife or pry bar (for removing old weather stripping), pencil, safety glasses, work gloves, cleaning supplies (mild soap, water, cloth), sandpaper (100-grit), and caulk with a caulk gun for corners and transitions.
For certain installations, you might also need a hacksaw (for cutting metal stripping), drill with bits (for pilot holes), or a miter box (for those professional-looking angle cuts).
Door Inspection: Critical First Step
“Measure twice, cut once” doesn’t just apply to carpentry. A thorough door inspection before you buy materials can save you headaches down the road.
First, check door alignment by opening and closing it several times. Does it move smoothly? Any sticking points or visible gaps? A properly hanging door is essential for effective weather stripping.
Next, inspect those hinges. Loose hinges can cause a door to sag, creating uneven gaps that are difficult to seal. A few minutes with a screwdriver tightening those hinge screws can make your installation much more effective.
Take a good look at your threshold – is it level and in good condition? A damaged threshold creates gaps that even the best weather stripping can’t seal properly.
Don’t forget to test the latch and strike plate. Your door should latch securely without forcing or leaving gaps when closed.

Measure all gaps using a gap gauge or even a credit card to check the space between door and frame at multiple points. Consistent gaps make for easier installation – if they vary significantly, you may need to adjust the door first.
Want to get really detective-like? Look for hidden air leaks on a windy day by holding a lit incense stick near the door edges. Drifting smoke reveals exactly where those sneaky air leaks are happening.
“It’s hard to do right,” admits Voytek, our senior technician who’s supervised about 5,000 weather stripping installations. “The threshold and sweep must be fully sound and aligned before applying weather stripping. Proper hinge and latch alignment is as important as the stripping itself.”
Climate Considerations for Chicago Homeowners
Living in Chicagoland means your weather stripping faces some serious challenges:
Our extreme temperature swings from sub-zero winters to sweltering summers put materials to the test. High humidity in summer months can affect adhesives, while those notorious freeze-thaw cycles stress even the best materials. And let’s not forget the snow and ice buildup that can push against your doors.
For these tough conditions, I recommend premium EPDM rubber weather stripping that stays flexible even when temperatures plummet. Look for reinforced door sweeps that can stand up to snow buildup, and always choose materials rated for at least -20°F to 120°F to handle whatever Mother Nature throws at us.
By taking time to choose quality materials and thoroughly inspect your door before you install door weather stripping, you’ll create a seal that performs beautifully for years to come – keeping you comfortable while cutting those energy bills down to size.
How to Install Door Weather Stripping: Step-by-Step
Now that you understand why door weather stripping is important and have selected the appropriate materials, let’s dive into the installation process. Following these steps carefully will ensure a professional-quality result that effectively seals your door against the elements.
Measure & Remove Old Seals
The first step in installing new weather stripping is to remove any old, worn-out seals and take accurate measurements.
-
Examine existing weather stripping: Note how it’s installed (adhesive, nails, or in a groove) to help determine removal method.
-
Remove old weather stripping:
- For adhesive-backed stripping: Use a putty knife or flat screwdriver to carefully pry it away from the surface.
- For nailed-in stripping: Gently pry up the nails with a small pry bar or flathead screwdriver.
- For kerf-style stripping: Pull it out of the groove, starting at one end.
-
Clean off residue: Remove any adhesive residue using a mild solvent or adhesive remover. For stubborn residue, try rubbing alcohol or a specialized adhesive remover.
-
Measure carefully:
- Measure the sides and top of the door jamb separately.
- Add about 10% extra to your measurements to ensure you have enough material.
- For the most accurate fit, measure the largest gap on each side of the door.
As one expert installer notes, “Measuring twice and cutting once is especially important with weather stripping. You can always trim excess, but you can’t stretch it if it’s too short.”
Prep the Frame & Door
Proper preparation of the surfaces is crucial for a long-lasting installation:
-
Clean thoroughly: Wash the door frame with mild soap and water to remove dirt, dust, and oils. Allow to dry completely.
-
Sand if necessary: If the surface is rough or has paint buildup, lightly sand with 100-grit sandpaper to create a smooth surface for adhesion.
-
Check and tighten hinges: Loose hinges can cause door misalignment. Tighten all screws and replace any that are stripped.
-
Adjust the strike plate if needed: If the door doesn’t close properly against the jamb, adjust the strike plate position for a tight seal.
-
Repair any damage: Fill holes or cracks in the door frame with wood filler and allow to dry completely before proceeding.
“One of the most common mistakes I see is installing new weather stripping on a poorly prepared surface,” explains our senior technician. “Taking the time to properly clean and prep the area will dramatically improve both adhesion and performance.”
Install Door Weather Stripping on Sides & Top
Now it’s time to install door weather stripping on the sides and top of your door:
-
Cut the weather stripping to length:
- Measure and cut the top piece first, ensuring it extends fully across the top of the door frame.
- For side pieces, measure from the threshold to the top corner.
- For the cleanest look, cut the ends at a 45-degree angle (miter cut) where they meet at corners.
- Remember to cut on the waste side of your measurement line.
-
Test fit before installation: Hold the cut pieces in place to ensure proper fit before removing any adhesive backing or attaching permanently.
-
Install the top piece first:
- For adhesive-backed stripping: Peel back a few inches of the backing and position the strip, then gradually remove more backing while pressing firmly into place.
- For nail-in types: Position the strip and secure with small nails or brads every 2-3 inches, starting from the center and working outward.
- For screw-mounted types: Pre-drill holes to prevent splitting, then attach with screws.
-
Install the side pieces:
- Follow the same procedure as the top piece.
- Ensure the weather stripping makes contact with the door when closed but doesn’t create excessive resistance.
- For the best seal, the weather stripping should compress about 1/3 of its thickness when the door is closed.

“Even a tiny 1/8-inch gap is like a 5-inch hole in your wall,” one energy auditor told us. “Proper compression of the weather stripping is key—too loose and it won’t seal; too tight and your door won’t close properly.”
Install Door Weather Stripping on the Bottom Sweep
The bottom of the door often has the largest gap and requires special attention:
-
Choose the right door sweep type:
- Door sweeps attach to the bottom of the door and brush against the threshold.
- Door shoes wrap around the bottom edge of the door and typically provide a better seal.
- Automatic door bottoms retract when the door opens and drop down when closed.
-
Measure and cut the sweep: Measure the width of your door and cut the sweep to length using a hacksaw for metal components or heavy-duty scissors for vinyl.
-
Position properly:
- Close the door and mark the correct height for the sweep.
- The sweep should make firm contact with the threshold but not drag excessively.
- For exterior doors, the sweep should be positioned so water runs off away from the interior.
-
Attach the sweep:
- Mark screw holes and drill pilot holes to prevent splitting.
- Attach with screws (not nails) for a secure fit that can be adjusted if needed.
- For vinyl or brush sweeps, ensure the bristles or vinyl fin make even contact with the threshold.
-
Adjust the threshold if possible:
- Many thresholds have adjustment screws that can be raised or lowered.
- Ideally, adjust the threshold to minimize the gap while still allowing the door to operate smoothly.
“When installing a door sweep, the key is finding the perfect balance,” explains our installation expert. “Too high, and you’ll still have drafts; too low, and your door will drag. Take your time with this step—it’s worth the extra effort.”
Test, Adjust & Seal Corners
The final step is to test your installation and make any necessary adjustments:
-
Perform the dollar bill test: Close the door on a dollar bill placed at various points around the frame. If you can pull the bill out without resistance, the seal needs adjustment.
-
Check for light infiltration: Close the door and look for any visible light coming through around the edges. Light indicates gaps in your weather stripping.
-
Feel for drafts: On a windy day, check for air movement around the door edges.
-
Seal corners and transitions:
- Apply a small bead of caulk to seal the corners where weather stripping meets.
- For the cleanest look, use clear silicone caulk and wipe away excess with a damp cloth.
-
Make final adjustments:
- Tighten or loosen screws as needed to achieve the proper compression.
- For adhesive strips that aren’t sealing properly, you may need to add a second layer or switch to a thicker product.
-
Test door operation: The door should close smoothly with slight resistance from the weather stripping but without requiring excessive force.
“The corners are where most air leaks occur,” notes one of our technicians. “Taking the extra time to properly seal these transitions with caulk can make a significant difference in your weather stripping’s effectiveness.”
Aftercare: Maintenance, Lifespan, Cost & Savings
Once you’ve completed the satisfying work of installing new weather stripping, you’ll want to protect that investment. Like most home improvements, a little ongoing attention goes a long way in extending the life of your weather stripping and maximizing your energy savings.
Maintenance Tips for Long-Lasting Weather Stripping
Your weather stripping works hard day in and day out, facing everything from scorching summer heat to brutal Chicago winters. Giving it a quick check twice a year—ideally in spring and fall—can help catch small issues before they become big problems.
During these seasonal check-ups, give your weather stripping a gentle squeeze. Quality weather stripping should bounce back when pressed. If it stays compressed or feels brittle, it’s losing its effectiveness. Also look for any tears, cracks, or spots where it’s pulling away from the door frame. In Chicago’s humid summers, you might even spot some mildew developing, which should be addressed promptly.
Keeping your weather stripping clean is surprisingly simple. For vinyl and rubber types, a quick wipe with mild soapy water does the trick. Metal weather stripping prefers a damp cloth followed by thorough drying to prevent corrosion. With foam varieties, a gentle dusting or vacuuming is all you need—harsh cleaners can actually degrade the material faster.
“I tell my customers that weather stripping is like tires on your car,” shares Voytek Glab, owner of Perfect Windows & Siding. “You don’t think about them until there’s a problem, but a little regular maintenance prevents bigger headaches down the road.”
If you spot sections coming loose, a dab of appropriate adhesive can often fix the issue. Tightening any loose screws takes just seconds but makes a big difference in performance. For vinyl or rubber stripping that’s getting stiff, a light application of silicone spray can restore flexibility and prevent cracking.

Lifespan Expectations
Not all weather stripping is created equal when it comes to longevity. The material you choose significantly impacts how often you’ll need to replace it:
Foam and felt varieties are the budget-friendly options, but they typically only last 1-2 years, especially on frequently used exterior doors. They’re great for quick fixes but not long-term solutions for Chicago’s climate extremes.
Vinyl and rubber weather stripping offers a middle ground, usually performing well for 3-5 years with proper care. These materials handle temperature changes reasonably well but will eventually harden and lose effectiveness.
Silicone is the premium choice, often lasting 5-10 years even in challenging conditions. Its superior flexibility and temperature resistance make it ideal for Chicagoland’s wild weather swings.
Metal weather stripping is the marathon runner of the bunch, often lasting 10+ years, though the gaskets or inserts may need replacement sooner. For historic homes or those seeking the longest-lasting solution, metal is worth considering despite its higher initial cost.
“In the 25 years I’ve been helping Chicago homeowners install door weather stripping, I’ve found that spending a bit more upfront on quality materials saves both money and hassle in the long run,” notes our senior installation specialist.
Cost Considerations: DIY vs. Professional Installation
One reason weather stripping is such a popular home improvement project is its affordability. For the DIY-inclined homeowner with basic tools, materials for weather stripping a standard door typically run between $15-$25, and the project can be completed in about an hour.
Professional installation naturally costs more, with industry data showing that about 80% of the expense is labor. However, for homeowners who aren’t comfortable with tools or have complex door situations, professional installation ensures proper fit and function—particularly important in our Chicago climate where even small gaps can lead to significant energy loss.
At Perfect Windows & Siding, we’re happy to guide you whether you choose the DIY route or prefer our professional installation services. We can recommend specific materials based on your particular doors and usage patterns.
Energy Savings and Return on Investment
The beauty of weather stripping is how quickly it pays for itself. According to the U.S. Department of Energy, properly sealing gaps and adding weather stripping can reduce energy costs by up to 20%. Even a more modest 10% reduction translates to hundreds of dollars saved annually for most Chicago-area homes.
Mary from Park Ridge shared her experience: “After the polar vortex last year, we finally got serious about sealing our doors. The materials cost us about $60 for three doors, and our January heating bill dropped by almost $85 compared to the previous year. By February, the project had already paid for itself!”
Beyond the financial savings, there’s also the immediate improvement in comfort—no more cold spots near doors or that annoying whistle when the wind picks up.
Climate Impact in Chicagoland
Living in the Chicago area means our weather stripping faces challenges that homeowners in milder climates don’t experience. Our winter temperatures regularly plunge below freezing, making drafts not just uncomfortable but potentially dangerous for pipes and plants near exterior doors.
The summer humidity can cause doors to swell slightly, while winter dryness leads to contraction—both affecting how well your weather stripping performs throughout the year. Add in our famous windstorms sweeping in off Lake Michigan, and even tiny gaps can feel like open windows.
For these reasons, we recommend Chicagoland homeowners opt for premium weather stripping materials specifically designed for extreme temperature variations. The small additional cost upfront delivers significant benefits in durability and performance over time.
For more information about improving your home’s efficiency with quality doors, check out our Door Replacement Chicago services, where we can help you evaluate whether better weather stripping or a full door replacement is the right choice for your situation.
Frequently Asked Questions about Installing Door Weather Stripping
After helping thousands of Chicago homeowners weather-proof their doors, we’ve heard just about every question imaginable. Let me share some of the most common ones we get at Perfect Windows & Siding, along with straightforward answers.
How do I know when to replace weather stripping?
Your weather stripping is probably ready for replacement if you notice any of these telltale signs. First, take a close look at the material itself—if you see cracks, tears, or compression that doesn’t bounce back when you press it, that’s a clear indicator.
Feel around your closed door on a windy day. Those cold drafts sneaking in are essentially dollar bills floating out! Another simple test is to close your door on a sunny day and look for light coming through around the edges. If you can see daylight, air is definitely getting through.
“I always tell homeowners not to wait until winter to check their weather stripping,” says our installation manager. “By then, you’ve already been losing energy and comfort for months. Fall is the perfect time to inspect and replace if needed.”
Many customers also report unexpected increases in energy bills, more outside noise coming in, or even tiny insects appearing mysteriously inside. Water stains near your threshold are another warning sign that your current seals aren’t doing their job.
Can weather stripping work on metal, wood, and garage doors?
Absolutely! But each door type requires specific considerations for the best results when you install door weather stripping.
Wood doors naturally expand and contract with seasonal changes, so they need flexible materials like silicone that can accommodate this movement. The good news is wood readily accepts nails and screws for secure attachment. Just remember that you might need slight adjustments as seasons change.
Metal doors actually make weather stripping even more important since metal conducts temperature so efficiently. We’ve found magnetic weather stripping works beautifully with steel doors, creating an excellent seal. Self-adhesive strips typically adhere well to metal’s smooth surface, though you might need special screws if you’re drilling into a metal frame.
For garage doors, think bigger and more durable. These larger entryways need specialized heavy-duty solutions—typically thicker EPDM rubber for bottom seals and brush-style or vinyl materials for the sides and top to accommodate the door’s unique movement pattern.
One customer in Des Plaines told us: “I never thought about weather stripping my garage door until Perfect Windows & Siding suggested it. What a difference! My attached garage used to feel like an icebox in winter, but now it stays much more comfortable.”
How much can I save on energy bills after installation?
This is everyone’s favorite question, and for good reason! Your potential savings depend on several factors, including your current door condition, how frequently you use the door, our lovely Chicago climate (which definitely works in favor of bigger savings), your heating system’s efficiency, and how many doors you weather-strip.
Based on Department of Energy data and our decades of experience with Chicago-area homes, here’s what we typically see:
Most homes save between 10-20% on energy bills with comprehensive air sealing. Even a single properly weather-stripped door can reduce heating costs by 5-10%. The best part? Most weather stripping projects pay for themselves within a single heating season.
Real savings from real customers: A family in Chicago’s North Side neighborhood told us their winter gas bill dropped by almost $45 per month after we helped them install door weather stripping on their Victorian home. That’s hundreds of dollars saved every year from a simple, affordable upgrade!
What about unusual door types or special situations?
In our 25+ years serving Chicagoland, we’ve encountered just about every door situation imaginable, and we’ve developed specialized techniques for each.
French doors present unique challenges because you need to seal not just the perimeter but also where the two doors meet (the astragal). We typically recommend an overlapping seal at the meeting point for the best results.
Sliding doors require a completely different approach. Brush-style or V-strip weather stripping works best along the tracks, and specialized bottom sweeps designed for sliding applications make all the difference.
For historic doors in Chicago’s beautiful older neighborhoods, we take extra care to preserve original appearances. Metal weather stripping often works well for historic preservation, and sometimes we create custom solutions for those unique dimensions.
Many homes have doors with uneven gaps due to settling or warping over time. In these cases, we might use different thicknesses of weather stripping around the same door, or suggest adjustable thresholds to address varying bottom gaps.
A properly weather-stripped door shouldn’t just save energy—it should still operate smoothly. At Perfect Windows & Siding, we make sure your doors seal tightly while still opening and closing with ease, no matter how unique your situation might be.
Conclusion
There’s something deeply satisfying about sealing up your home against Chicago’s fierce elements. After helping thousands of homeowners install door weather stripping over my years in the business, I’ve seen how this simple upgrade transforms homes from drafty to cozy.
When you properly seal your doors, you’re not just saving money—you’re creating a sanctuary from our notorious Midwest weather. Those bone-chilling drafts that used to sneak under your door during January blizzards? Gone. The summer humidity that somehow found its way inside? Blocked. The constant background noise from the street? Significantly reduced.
The beauty of weather stripping is its remarkable return on investment. For a project that typically costs under $30 in materials and takes just an hour of your time, you could see up to 20% savings on your energy bills. In Chicago’s climate, that adds up quickly—most of our customers report that their weather stripping pays for itself before winter is even over.
At Perfect Windows & Siding, we believe in empowering homeowners with the knowledge to tackle projects like this themselves. But we also understand that not everyone has the time or inclination for DIY work. As a family-owned business serving Chicago, Des Plaines, and surrounding communities, we’re always here to help with professional installation when you need it.
Weather stripping works best as part of a comprehensive approach to home efficiency. For maximum comfort and energy savings, consider complementing your newly sealed doors with:
- High-performance replacement doors that offer better insulation
- Energy-efficient windows that prevent heat transfer
- Professional exterior caulking to seal stationary gaps
- Proper attic and wall insulation to complete your home’s thermal envelope
Each of these improvements builds on the others, creating a home that stays comfortable year-round while keeping your energy bills in check. That’s especially important in our region, where temperatures can swing from -20°F in winter to 95°F with high humidity in summer.
Whether you decide to install door weather stripping yourself or call in our experts, taking this step means you’re joining thousands of smart Chicagoland homeowners who’ve finded that comfort doesn’t have to be expensive. It just requires attention to the details that make a house truly weather-tight.
Ready to transform your home’s comfort and efficiency? We’re here to help with advice, quality materials, and professional installation services whenever you need them. Your comfort isn’t just our business—it’s our commitment to our neighbors throughout Chicago and beyond.
For more information about our door replacement and weatherization services in Chicago, Des Plaines, and throughout Illinois, visit our website or contact us directly. Let’s make your home the cozy, efficient haven it was meant to be!
