

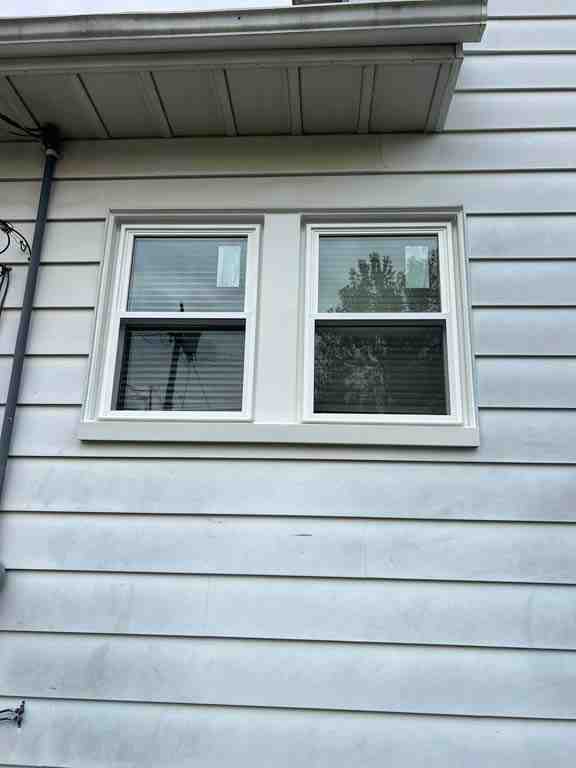
Why Vinyl Window Installation Matters for Chicago Homeowners
Vinyl window installation is one of the most cost-effective ways to improve your home’s energy efficiency, curb appeal, and comfort—especially in Chicago’s extreme weather conditions. Whether you’re dealing with drafty windows, rising energy bills, or outdated frames, professional installation ensures your new vinyl windows perform as designed for decades.
Quick Overview: What You Need to Know About Vinyl Window Installation
| Key Factor | What to Expect |
|---|---|
| Average Cost | $467–$714 per window (materials + labor) |
| Installation Time | 3–4 hours per window for replacement; under 1 hour for new construction |
| Best Season | Warm weather (vinyl can crack in extreme cold) |
| Installation Method | From inside (pocket replacement) or outside (full-frame) |
| Key Benefits | Energy efficiency, durability, low maintenance, 10–30% cheaper than wood/fiberglass |
Vinyl windows are made from PVC (polyvinyl chloride) with UV stabilizers and insulated hollow cavities, making them resistant to temperature fluctuations and moisture damage. Professional installation is critical because improper fitting—even by a fraction of an inch—can lead to air leaks, water infiltration, and operational problems.
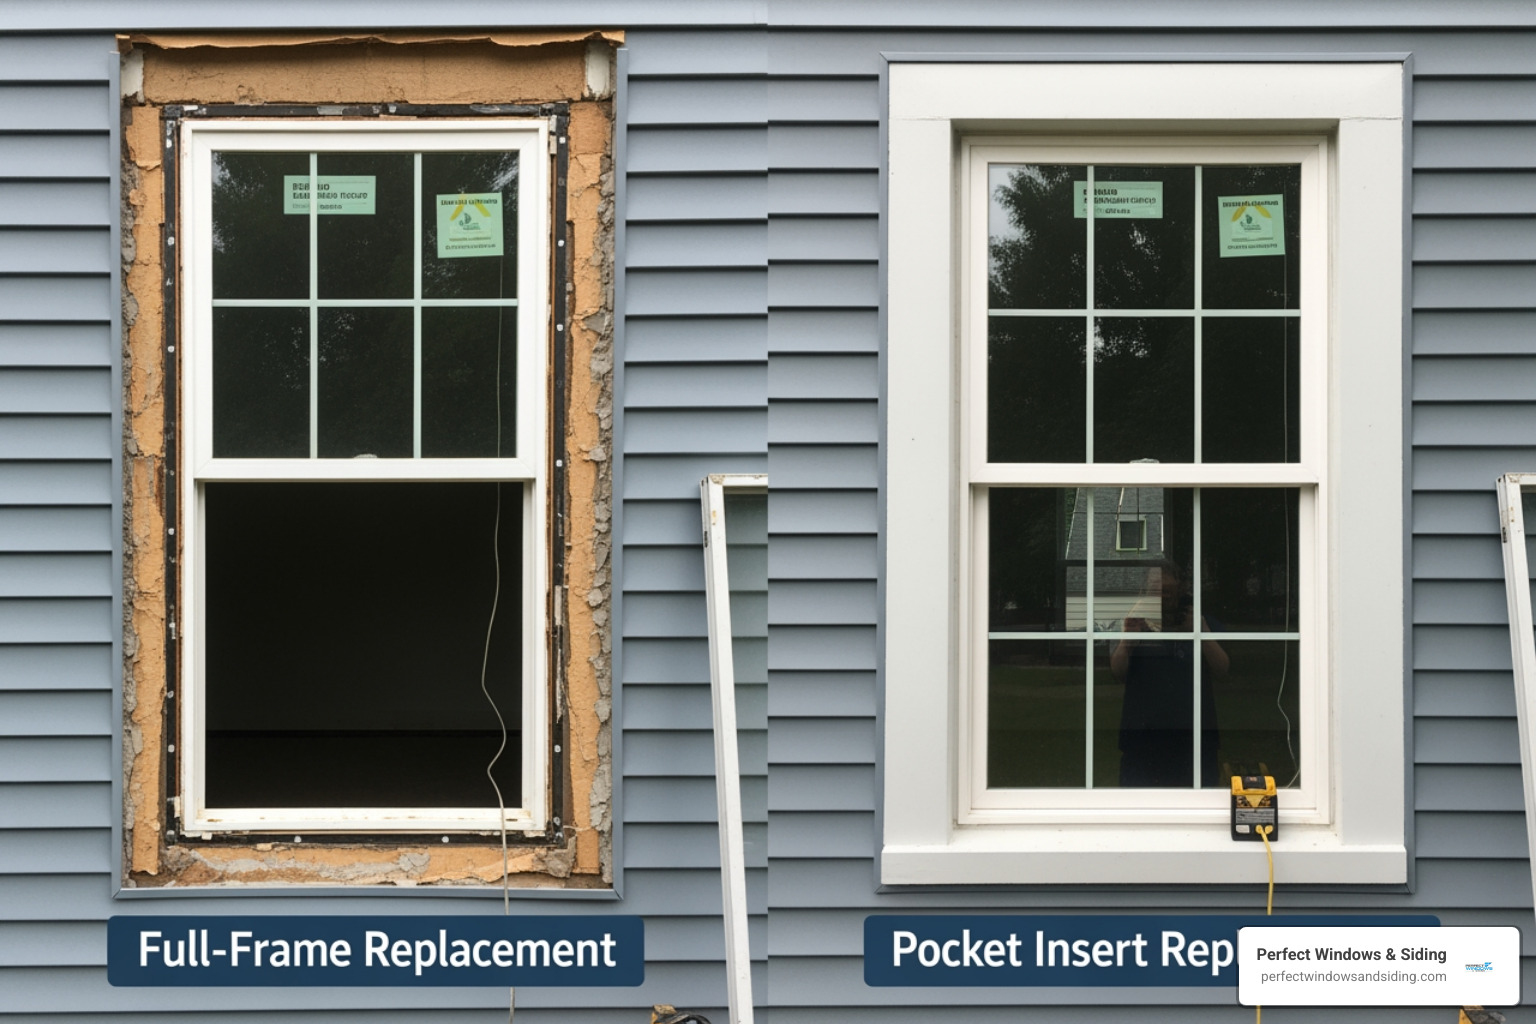
Two main installation types exist:
- Full-frame replacement: Complete removal of the old window down to the rough opening (necessary when frames are damaged or rotted)
- Pocket/insert replacement: New window fits inside the existing frame (faster, less invasive, ideal when frames are in good condition)
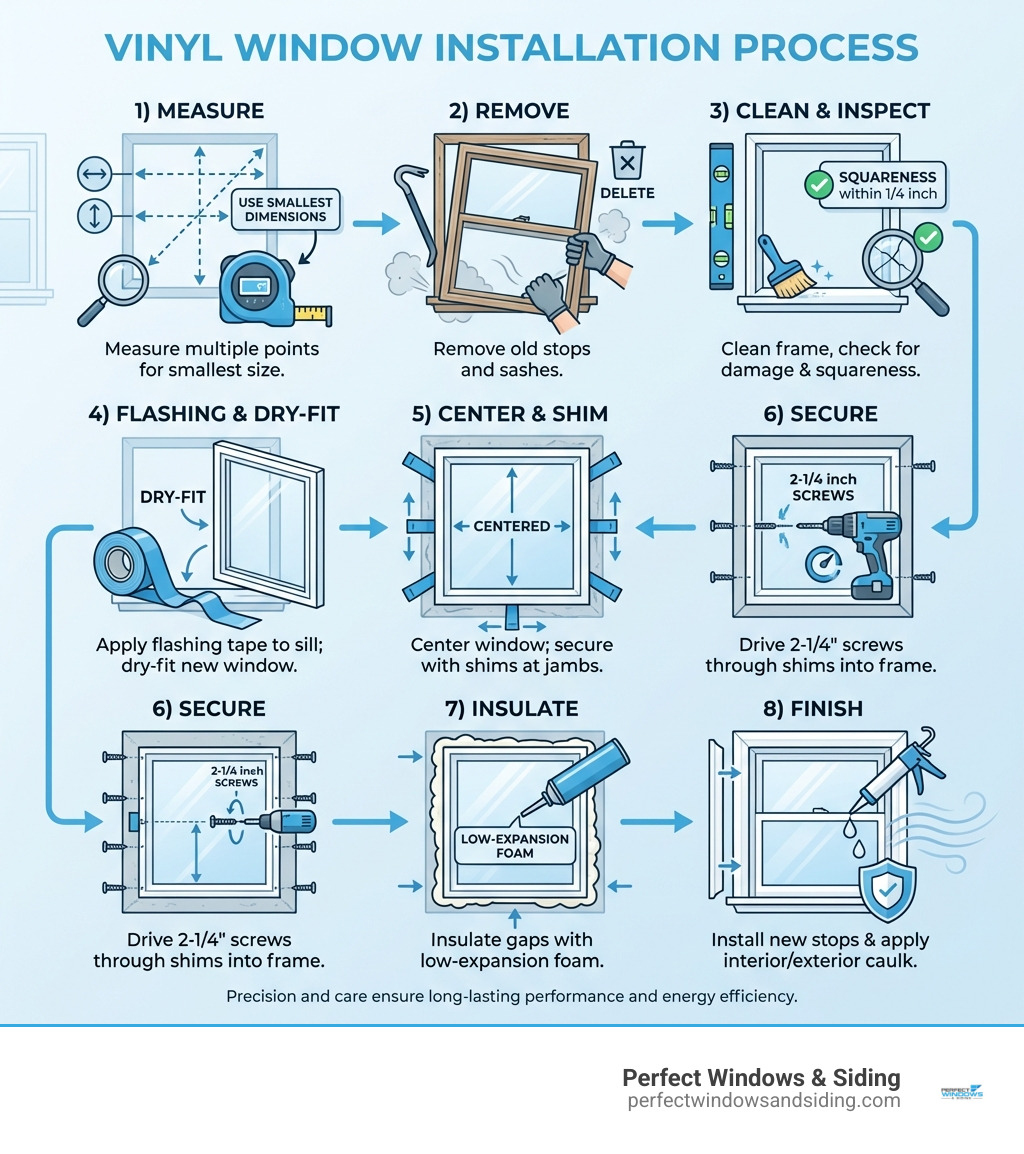
The installation process involves precise measurement (within 1/4 inch tolerance), proper shimming for level and plumb alignment, sealing with flashing tape and caulk, and insulating gaps with low-expansion foam. Mistakes like over-tightening screws, using high-pressure foam, or skipping the dry-fit can warp frames and void warranties.
I’m Voytek Glab, owner of Perfect Windows & Siding, and I’ve been overseeing vinyl window installation projects across Chicagoland for over 20 years. From measuring and fitting to sealing and finishing, I personally ensure every installation meets the highest standards for performance and longevity.
Vinyl window installation helpful reading:
Understanding Vinyl Window Installation Options
When you begin looking into Window installation, the first decision you’ll face is which method of replacement is right for your home. Vinyl windows are incredibly versatile, but the “how” of the installation depends heavily on the condition of your existing window frames.
Full-Frame Replacement
This is the “start from scratch” approach. In a full-frame vinyl window installation, we remove the entire window—sashes, frame, and often the interior and exterior trim—until only the rough opening of the house remains. This is the preferred method if you have wood rot, mold, or structural damage in the original frame. It allows us to inspect the wall’s integrity and apply fresh Vinyl siding installation or flashing to ensure a 100% watertight seal.
Pocket or Insert Windows
Often called a “retrofit,” this method is popular among Chicago homeowners because it is less invasive. If your existing window frames are sturdy, square, and free of rot, we can slide a new vinyl insert directly into the existing pocket. This preserves your original interior trim and exterior siding, making it a faster and more affordable option.
Why Vinyl? PVC and Performance
Vinyl windows are manufactured using high-quality PVC. Modern vinyl includes UV stabilizers that prevent the material from breaking down or discoloring under the harsh summer sun. Furthermore, vinyl is a thermoplastic, meaning it’s designed to handle the expansion and contraction that comes with our local temperature swings without cracking.
| Feature | Pocket/Insert Installation | Full-Frame Installation |
|---|---|---|
| Cost | Lower ($100–$300 labor) | Higher ($180–$1,500 labor) |
| Complexity | Simple; fits in existing frame | Complex; involves trim/siding |
| Time | 1–2 hours per window | 3–4 hours per window |
| Best For | Frames in good condition | Rotted or damaged frames |
Preparation and Measurement Standards
Success in vinyl window installation is determined long before the first screw is driven. It starts with the tape measure. In our 20 years of serving the Chicago area, we’ve seen how even a tiny measurement error can lead to a drafty home.
To get the right fit, you must measure a window for replacement by taking three width measurements (top, middle, bottom) and three height measurements (left, middle, right). Always use the smallest dimension of the three. This ensures the new window will actually fit into the opening.
The “Squareness” Check
A window opening might look like a perfect rectangle, but older homes in Des Plaines or Park Ridge often settle. We measure the diagonals—from the top-left corner to the bottom-right, and vice versa. If these two measurements are within 1/4 inch of each other, the opening is square. If they aren’t, we use shims during installation to “fake” a square opening so the window sashes can slide smoothly.
Essential Tools for Vinyl Window Installation
If you’re tackling this as a DIY project, you’ll need more than just a hammer. Here is the professional toolkit we use:
- Tape measure: For that critical triple-check.
- Pry bar: To remove old stops and sashes without damaging the frame.
- Level: An 18-inch or 24-inch level is vital for ensuring the window isn’t tilted.
- Caulking gun: For applying both silicone (exterior) and latex (interior) sealants.
- Power drill: To drive the 2-1/4 inch stainless steel screws into the jambs.
- Oscillating multi-tool: Helpful for cutting through old nails or stubborn trim.
- Safety glasses: Essential when removing old glass or prying wood.
Step-by-Step Guide to Professional Fitting
Once the old window is out and the opening is clean, the real work begins. We start by prying away the old sashes and removing any sash weights or springs. In older Chicago bungalows, these weights are often hidden in “pockets” in the wall; we recommend filling these pockets with insulation to prevent cold air from entering the home.
The Dry-Fit
Before applying any sealant, we always “dry-fit” the window. This means placing the new vinyl unit into the opening to ensure it fits comfortably with enough room for shimming. If it fits, we remove it and apply a thick bead of silicone caulk to the window stool and the interior blind stops.
Centering and Leveling
We place the window back in, centering it in the opening. This is where the shims come in. We slide shims between the new window frame and the house framing, usually near the screw holes. We use our level to check that the window is plumb (perfectly vertical) and level (perfectly horizontal). This is a step where many DIYers fail—avoid these top 5 window installation mistakes by taking your time with the level.
Securing the Vinyl Window Installation
With the window perfectly positioned, we drive 2-1/4 inch stainless steel screws through the side jambs and the shims into the house framing. It is critical not to over-tighten these screws; doing so can “bow” the vinyl frame, making the window difficult to open or lock.
Sealing and Insulating
Once the window is secure, we fill the gaps between the window and the wall. We use low-expansion polyurethane foam. Unlike standard “high-expansion” foam, this version won’t put pressure on the vinyl frame as it cures. Finally, we apply a high-quality silicone sealant to the exterior to ensure a watertight finish. This attention to detail is what makes for an energy efficient window replacement.
Costs and Timing for Vinyl Window Installation
Budgeting is a major part of any home improvement project. In April 2025, the estimated cost for vinyl window installation in the Chicagoland area typically starts between $467 and $714 per window. This includes the window itself, labor, and supplies.
Cost Breakdown
- Retail Window Price: Quality PVC windows often range from $235 to $360.
- Labor: Professional labor typically runs $30–$90 per hour. For a standard Replacement windows Chicago project, you might spend $100–$300 per window for a pocket install.
- Supplies: Caulk, flashing tape, shims, and foam add a small but necessary cost to each unit.
DIY vs. Professional Labor
While DIY installation can save you the labor fee, it comes with risks. Professional installers like us can often complete a window in about an hour, whereas a DIYer might spend 3 to 4 hours per window. Furthermore, many manufacturer warranties—like those from Pella—require professional installation to remain valid. If a window is installed incorrectly and leaks, the cost of repairing water damage to your walls will far exceed the initial labor savings.
Best Timing
While we install windows year-round, the best time for vinyl window installation is during warmer weather. Vinyl is a plastic-based product; in extreme Chicago winters, it can become more brittle, increasing the risk of cracking during the prying or screwing process. If we must install in winter, we use specific “cold-weather” sealants that can cure in lower temperatures.
For more on how new windows affect your home’s performance, check out the U.S. Department of Energy window data.
Frequently Asked Questions
Should vinyl windows be installed from the inside or outside?
It depends on the type of installation. Pocket or insert windows are almost always installed from the inside. This is safer for upper floors and prevents damage to your exterior siding. However, full-frame or new construction windows (those with a nailing flange) must be installed from the outside to properly integrate with the home’s weather barrier and siding.
What is the best time of year to install vinyl windows?
Spring, summer, and early fall are ideal. Warmer temperatures allow the vinyl to remain flexible and ensure that caulking and sealants cure properly. If you are planning a Residential window installation services project, we recommend scheduling between April and October for the best results.
How long does it typically take to install a vinyl replacement window?
For a professional crew, a standard pocket replacement takes about 1 to 2 hours. A full-frame replacement, which involves removing trim and siding, can take 3 to 4 hours. Most whole-house projects in the Chicago suburbs can be completed in just one or two days.
Conclusion
At Perfect Windows & Siding, we believe that every Chicago home deserves the protection and efficiency of a high-quality vinyl window installation. As a local, family-owned business with over 20 years of experience, we don’t just “slap in” windows. We take the time to measure precisely, shim accurately, and seal expertly.
Whether you are in Naperville, Skokie, or downtown Chicago, we provide custom solutions tailored to our local climate. We are so confident in our craftsmanship that we offer a lifetime warranty on our work. When you’re ready to upgrade your home’s comfort and value, we’re here to help.
Schedule your window installation with Perfect Windows & Siding today and experience the difference that professional, local expertise makes.