
Why Awning Window Installation Matters for Your Home
Awning window installation is a home upgrade that combines ventilation, natural light, and weather resistance in one neat solution. If you’re considering this project, here’s what you need to know:
What to Expect During Awning Window Installation:
- Preparation – Measure the rough opening (typically 1/4″ to 3/4″ larger than the window frame) and inspect for damage
- Installation Method – Choose between full-frame replacement (removes old frame to studs) or retrofit installation (fits into existing frame)
- Key Steps – Apply flashing, set and shim the window for level and plumb, secure with fasteners, insulate gaps, and seal the exterior
- Timeline – Professional installation typically takes 1-2 hours per window
- Cost Consideration – Full-frame installation provides the best long-term results, especially for rotted or damaged frames
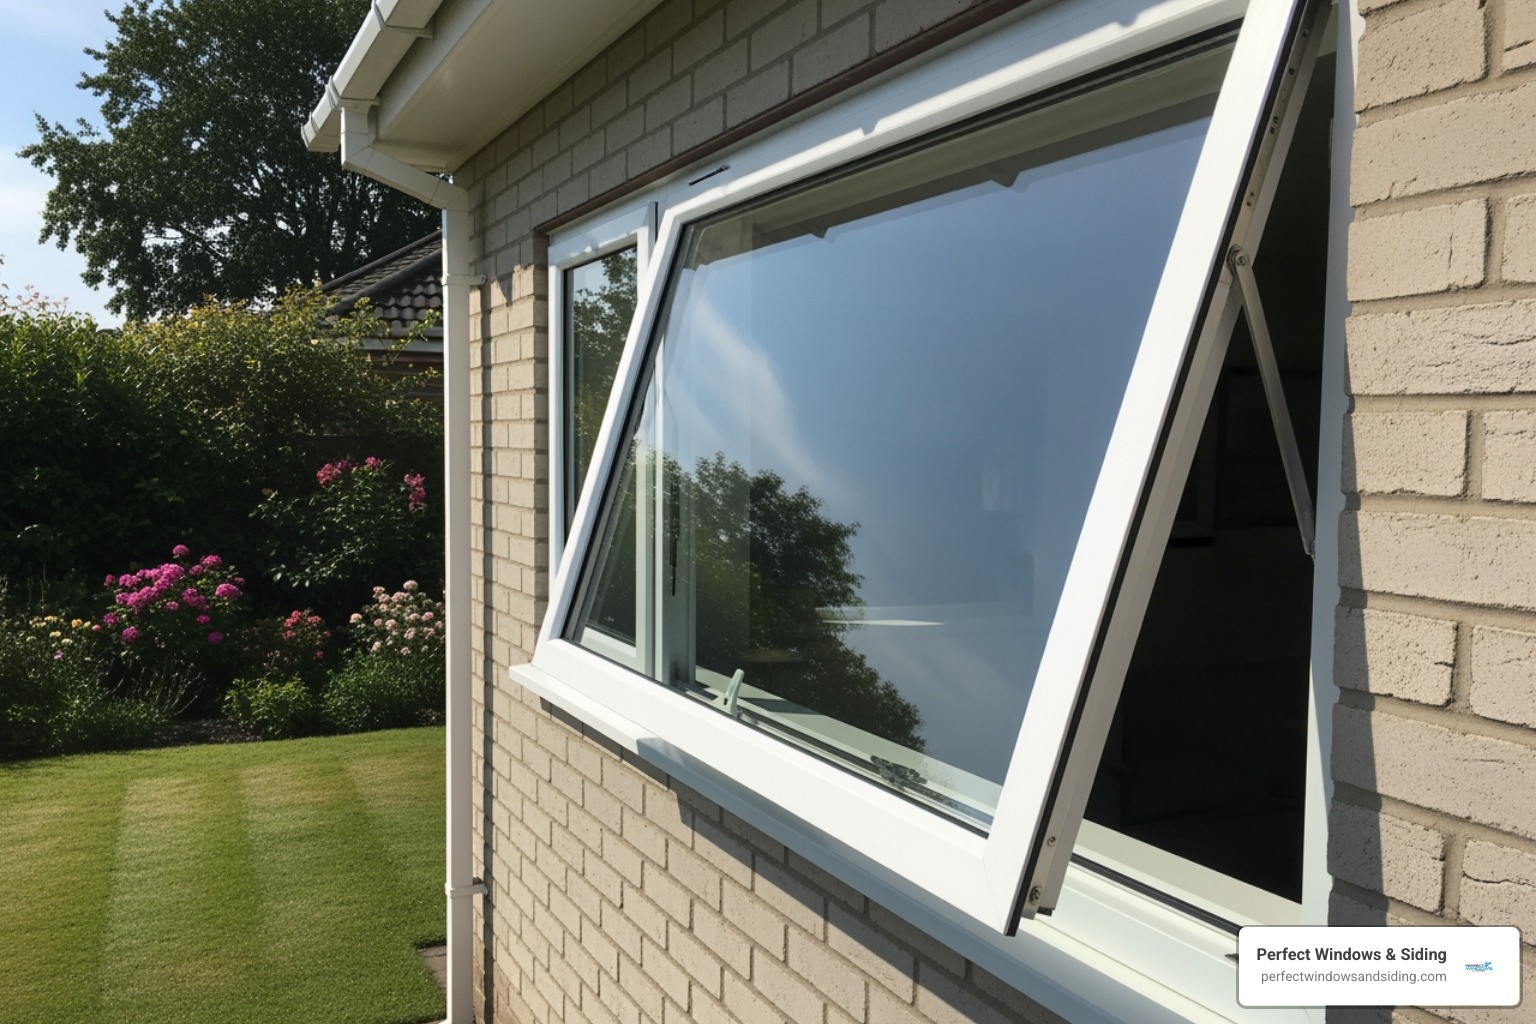
Awning windows are hinged at the top and open outward from the bottom, making them perfect for kitchens, bathrooms, and basements where you want fresh air even during light rain. The challenge is that installation precision directly impacts performance—a window that’s not level, properly sealed, or correctly flashed will leak, draft, and fail prematurely.
I’m Voytek Glab, owner of Perfect Windows & Siding, and I’ve overseen hundreds of awning window installations across the Chicagoland area over the past 20 years. The difference between a window that lasts 10 years versus 30 often comes down to the critical details covered in this guide.

Explore more about Awning window installation:
Before You Begin: Preparation for a Perfect Awning Window Installation
This section covers the crucial first steps before the window goes in, from gathering tools to understanding the type of installation your home needs. A successful awning window installation always starts with thorough preparation.
Essential Tools and Materials
Before we even think about touching the window, we need to gather our arsenal of tools and materials. Having everything on hand prevents frustrating delays and ensures a smooth installation process. Here’s a comprehensive list of what you’ll need for a precise awning window installation:
- Safety Gear: Safety glasses and sturdy work gloves are non-negotiable.
- Measuring Tools: Tape measure (retractable and accurate), framer’s square (for checking squareness).
- Levels: A 4-foot spirit level to check for plumb and level.
- Cutting & Removal: Utility knife (for flashing and caulk), reciprocating saw (if removing an old frame).
- Drilling & Fastening: Power drill with various bits (e.g., 3mm for pre-drilling, 3/16″ for pilot holes), power driver and bits, #8 x 3″ pan head screws (or manufacturer-recommended fasteners).
- Sealing & Insulation: Caulking gun, high-quality exterior-grade sealant (ASTM C920), low-expansion spray foam for windows, backer rod, and batt insulation.
- Shims & Packers: Composite shims (never wood shims that can absorb moisture and rot!), packers (for leveling the bottom plate).
- Flashing: Flashing tape (self-adhering, compatible with window materials), pan flashing material.
- Adjustments: Mini pinch bar (for subtle adjustments), hammer.
- Cleanup: Drop cloth (to protect floors), putty knife, cleaning supplies.
- Helper: A second person is invaluable for safety and precision with larger windows.
Using the right tools is half the battle. Our teams come fully equipped for a perfect installation.
Full-Frame vs. Retrofit Installation: Choosing Your Method
When approaching an awning window installation, one of the first critical decisions is determining the installation method: full-frame replacement or retrofit installation. This choice largely depends on the condition of your existing window and the surrounding structure.
| Feature | Full-Frame Replacement | Retrofit Installation |
|---|---|---|
| Old Frame Removal | Completely removes the old window and its frame down to the rough opening. | Fits the new window into the existing frame, leaving it largely intact. |
| When to Choose | Recommended when the existing frame is rotted, damaged, or you want to maximize glass area. | Ideal for situations where the existing frame is sound and undamaged, and you want a faster, less disruptive, and often more affordable option. |
| Benefits | Provides the best long-term results, allows for thorough inspection and repair of the rough opening, maximizes energy efficiency and daylight. | Faster, less intrusive, preserves existing interior and exterior trim. |
| Complexity | More labor-intensive, requires more material, and typically takes longer. | Less complex, quicker to complete. |
| Structural Check | Allows for complete structural inspection and repair of the rough opening. | Limited opportunity to inspect the structural integrity of the rough opening without removing the old frame. |
| Approaches | Includes “stud-to-stud” for older homes with wood framing, and “brick-to-brick” for masonry homes. | New window fits within the existing frame. |
A full-frame replacement removes the old window and frame, exposing the rough opening. This allows us to inspect for rot or damage and address it before installing the new window. It provides the best long-term results and energy efficiency, as we can fully insulate the opening. For Chicago’s masonry homes, we use a “brick-to-brick” approach. For brick veneer, we ensure a 1/2″ gap below the sill to prevent “brick bind.”
A retrofit installation fits a new window into the existing frame. It’s a faster, less disruptive option if your current frame is in excellent condition. The replacement window should be about 1/4″ smaller in width and height than the existing frame’s opening to allow for proper shimming and sealing.
The best method for your awning window installation depends on your home’s specific needs and condition. We always assess your situation to recommend the most suitable approach for lasting performance.
More about window replacement options.
Measuring and Preparing the Rough Opening
Accurate measurements and a prepared rough opening are the foundation of a successful installation, preventing future drafts and structural issues.

Measure the width in three places (top, middle, bottom) and height in three places (left, middle, right), using the smallest measurement for the window size. This ensures a proper fit. For new construction, the rough opening is ideally 20mm wider and 30mm higher than the window. A gap of 1/4″ to 3/4″ around the frame is crucial for shimming and insulation.
Next, we check for squareness. We do this by measuring diagonally from corner to corner. The two diagonal measurements should be the same, or at least within a couple of millimeters (or 1/8″) of each other. If they’re not, it indicates a racked or out-of-square opening, which needs to be corrected before installation. An un-square opening will lead to an un-square window, causing operational problems and potentially voiding warranties.
After measuring, we carefully prepare the rough opening. This involves:
- Cleaning: Removing all debris, old nails, screws, and loose materials.
- Inspecting for Damage: We carefully check for any signs of rot, mold, or structural damage. If we find any, we repair it thoroughly to ensure a solid foundation for your new window.
- Leveling the Sill: The bottom plate where the window will sit must be perfectly level. We use packers to ensure this, creating a stable base.
- Addressing Lead Paint: For homes built before 1978, we are acutely aware of the potential for lead-based paint and take appropriate precautions during removal and preparation.
Proper preparation might seem tedious, but it’s an investment in the longevity and performance of your awning window installation.
Learn how to measure a window for replacement.
The Step-by-Step Guide to Installing Your Awning Window
With preparation complete, it’s time to install your awning window. This process requires precision and adherence to best practices for a secure, weatherproof, and smooth operation.
Step 1: Flashing and Sealing the Opening
Proper flashing and sealing are your home’s first line of defense and are critical for the longevity of your awning window installation. Without it, water intrusion can lead to costly damage like rot and mold.

Here’s how we ensure a watertight seal:
- Weather-Resistant Barrier (WRB) Preparation: If installing in new construction, we ensure the Weather-Resistant Barrier (like house wrap) is properly cut and integrated around the opening. We typically make 45-degree cuts away from the corners, trimming about 2 inches up from the bottom corners.
- Sill Pan Flashing: We start at the bottom by installing a sill pan flashing. This directs any water that might penetrate the window frame to the exterior, away from your wall structure. We often apply a continuous 3/8-inch bead of sealant on the sill before setting the window.
- Flashing Tape Application: We apply self-adhering flashing tape in a “shingle-style” application, starting from the bottom and working our way up. This means each layer overlaps the one below it, like shingles on a roof, preventing water from getting behind the tape. The flashing material must be compatible with flexible PVC (vinyl) and should never contain asphalt.
- Sealant Bead: Before placing the window, we apply a continuous bead of high-quality exterior-grade sealant along the inside edge of the rough opening’s perimeter – where the window frame will meet the flashing. This creates an additional barrier against air and water intrusion.
We understand that the nailing fin on many windows is not designed to be a weatherproof flashing itself. It’s the integrated system of WRB, sill pan, flashing tape, and sealant that truly protects your home. This meticulous approach to water management is what sets a professional awning window installation apart.
Information on professional flashing systems.
Step 2: Setting, Shimming, and Squaring the Window
Now, gently place the awning window into the prepared opening. This requires precision to ensure the window is perfectly level, plumb, and square.
- Placing the Window: With a helper, we carefully lift the awning window and tilt it into the prepared opening from the outside. If it’s a replacement, we ensure the handle is tightened and the window is closed before placing it. We also make sure the window sits correctly against any sill angle or head expander if those were installed. For a new installation, we ensure a 10mm overhang into the house on the exterior side.
- Initial Fastening (Temporary): We may initially fix nails or screws into the stud through pre-drilled holes at the sill and top of the reveal, but we do not drive them in all the way. This holds the window loosely in place for adjustments.
- Using Composite Shims: This is where the magic of leveling happens. We strategically place composite shims (never wood, which can absorb moisture and rot) between the window frame and the rough opening. These shims provide solid backing for fasteners and allow us to fine-tune the window’s position. We ensure shim blocks are centered on installation holes and provide a flat spot for shimming. Shim spaces should be no more than 1/4” per side.
- Checking for Plumb and Level: Using our 4-foot spirit level, we check the window frame’s vertical (plumb) and horizontal (level) alignment. We adjust the shims until the window is perfectly plumb and level on all sides. An unlevel window will bind, operate poorly, and compromise the seal.
- Diagonal Measurements for Squareness: To confirm the window is perfectly square, we take diagonal measurements from corner to corner across the frame. Both diagonal measurements should be the same, or at least within a couple of millimeters (or 1/8″) of each other. If there’s a discrepancy, we adjust the shims and use a mini pinch bar as needed until the frame is perfectly square. This ensures the sash operates smoothly and the seals engage correctly.
- Ensuring an Even Gap: We make sure the gap between the window frame and the rough opening is consistent around the entire perimeter. This consistency is essential for proper insulation and sealing later on. We also pack between the reveal and the stud above the nails.
This meticulous shimming and squaring process is crucial. It ensures your awning window not only looks great but also operates flawlessly and provides optimal energy performance for years to come.
Explore custom-sized windows for a perfect fit.
Step 3: Securing, Insulating, and Sealing the Exterior
With the window plumb, level, and square, it’s time to secure it permanently and create a barrier against the elements.
- Fastening the Window Frame: Once we’re completely satisfied with the window’s position, we drive the fasteners (typically #8 x 3″ pan head screws) through the pre-drilled access holes in the jambs, into the rough opening. It’s crucial not to fasten through the top header or bottom sill, as this can distort the window frame and impair its operation. We also make sure not to over-tighten the screws, as this can bow the frame and lead to operational issues and seal failures. If there are pre-punched installation holes, we use those; otherwise, we drill them 4″ to 6″ from each corner.
- Insulating the Gaps: Now, we turn our attention to the gaps between the window frame and the rough opening. We use low-expansion spray foam specifically designed for windows and doors. This type of foam expands gently, filling cavities without putting excessive pressure on the window frame. This is a critical distinction – using high-expansion foam can easily bow the jambs, leading to a warped window, poor operation, and seal failure. For larger gaps (wider than 1/4″), we might first use a backer rod to fill most of the space before applying the foam. Proper insulation is key to achieving the energy efficiency benefits of your new windows and preventing drafts.
- Exterior Caulk Application: With the window secured and insulated, we move to the exterior. We apply a continuous, even bead of high-quality, exterior-grade sealant around the entire perimeter where the window frame meets the exterior siding or trim. This creates a watertight seal, preventing moisture intrusion. We pay particular attention to the areas where the window frame meets the blind stops or sill angle filler. For brick bind on standard wood frame construction with brick veneer, we ensure at least 1/2″ between the bottom of the window sill and the top row of brick, and apply sealant appropriately.
- Tooling the Sealant: This step might seem minor, but it’s essential for both aesthetics and performance. We “tool” the caulk, using a specialized tool or a gloved finger, to create a smooth, slightly concave bead. This not only looks professional but also ensures maximum adhesion and a more durable, watertight seal that will stand up to Chicago’s weather.
This comprehensive approach to securing, insulating, and sealing is vital for a durable, energy-efficient, and leak-free awning window installation. It’s how we ensure your window performs beautifully for decades.
Tips for buying energy-efficient windows.
Step 4: Final Checks and Hardware Installation
The window is in, but we’re not done. Final checks and hardware installation are crucial to ensure everything works correctly and prevent future issues.
- Testing the Crank Mechanism: We operate the crank handle through its full range of motion. It should turn smoothly and effortlessly, opening and closing the window without any binding or resistance. Any stiffness or grinding indicates a problem that needs immediate attention.
- Checking Sash Operation: We fully open and close the awning window sash. It should move freely and close tightly against the frame. A crucial check is to ensure both corners of the sash come into contact with the sill at the same time when closing. If one side hits before the other, it indicates a slight twist in the frame that needs to be corrected by adjusting shims. This ensures a consistent, tight seal all around.
- Engaging Locks: We test all multi-point locks, ensuring they engage securely and smoothly. Multi-point locks are a key feature of many awning windows, providing improved security and a tighter seal for better energy efficiency.
- Draft Check: We perform a final draft check by running our hand around the perimeter of the closed window, feeling for any air leaks. If we detect any, it means the sealing or insulation isn’t perfect, and we’ll address it immediately.
- Re-installing Interior Trim: Once we’re completely satisfied with the window’s operation and seal, we carefully re-install or replace any interior trim that was removed during the installation process. This brings the interior finish back to a polished, professional look. We also apply sealant to the interior where the stops meet the window.
- Hardware Selection and Installation: Proper hardware selection and installation plays a huge role in your window’s long-term performance. For additional insights on this topic, you can find helpful information on window hardware.
These final steps are what separate a good awning window installation from a truly professional one, ensuring your new window performs optimally for years to come.
DIY vs. Professional Installation: Avoiding Common Pitfalls
Deciding between DIY and hiring a professional is a critical choice. While DIY seems to save money, an incorrect awning window installation is complex and can lead to greater costs later.
Top Mistakes in a DIY Awning Window Installation
We’ve seen many botched DIY attempts in Chicagoland. The consequences can be expensive. Here are the most common mistakes:
- Incorrect Measurements: This is perhaps the most fundamental error. Ordering a window that’s even slightly too large or too small can render it unusable or compromise its performance. The replacement window should be approximately 1/4″ less in both width and height than the opening. We always measure twice, sometimes thrice, to ensure accuracy.
- Improper Sealing and Flashing: Many DIYers underestimate the importance of a robust weatherproofing system. Failing to apply flashing tape in a shingle-style manner or using inadequate sealant invites water leaks, drafts, and eventually, rot and mold within your wall cavities. This is where the longevity and performance of your awning window installation truly hinge.
- Not Leveling the Window: An unlevel or un-square window will bind when opening and closing, putting undue stress on the hardware and seals. It also creates uneven gaps, making proper insulation and sealing impossible. This leads to drafts and reduced energy efficiency.
-
Using High-Expansion Foam: This is a classic rookie mistake. High-expansion spray foam, while great for some applications, can exert immense pressure as it cures. If used around a window frame, it can easily bow the jambs, warping the frame and causing operational issues. Always use low-expansion foam specifically designed for windows and doors.
-
Over-tightening Fasteners: It’s tempting to really cinch down those screws, but over-tightening can distort the window frame, leading to operational problems and compromising the integrity of the seals. We snug fasteners just enough to hold the window securely without deforming the frame.
- Voiding the Warranty: Many window manufacturers’ warranties require professional installation. A DIY mistake could mean you’re on the hook for costly repairs or replacements that would otherwise be covered.
These mistakes not only undermine the performance of your new window but can also create significant structural problems for your home.
Read our guide on top window installation mistakes.
When to Hire a Pro for Your Awning Window Installation
While we admire the DIY spirit, an awning window installation is often best left to experts due to the precision required. Here’s when we recommend calling the pros at Perfect Windows & Siding:
- Structural Damage: If your existing window frame or the surrounding wall shows signs of rot, water damage, or structural instability, a professional can properly assess and repair these issues before installing the new window. This is crucial for your home’s integrity and safety.
- Rotted Wood: Rotted wood around a window opening is a red flag. It indicates a deeper problem with moisture intrusion that needs to be thoroughly addressed by experienced hands. We can identify the source of the moisture and make necessary repairs to prevent recurrence.
- Upper-Floor Installations: Working at heights carries significant safety risks. Our teams are trained in safe lifting techniques and equipped with the proper safety gear and equipment to handle installations on upper floors safely and efficiently.
- Lack of Proper Tools or Experience: An awning window installation requires a specific set of tools and a keen understanding of building science, flashing techniques, and sealing compounds. If you don’t have the right tools or the necessary experience, the risk of error increases dramatically.
- Ensuring Code Compliance: Building codes, especially in a metropolitan area like Chicago, can be complex and vary. Professionals are knowledgeable about local regulations and ensure your installation meets all necessary requirements, avoiding potential fines or future issues when selling your home.
- Lifetime Warranty and Peace of Mind: We offer a lifetime warranty for peace of mind. With 20+ years of experience in Chicagoland and nearly 15,000 installations, our expertise ensures your awning window installation is done right the first time, so your windows perform beautifully for years.
- Time and Effort: A professional installation team can typically install one awning window in 1-2 hours. For a DIYer, this can easily stretch into a full day or more, especially if unexpected issues arise. We save you time and hassle.
Choosing a professional for your awning window installation is an investment in your home’s comfort, efficiency, and value. As a local, family-owned business, we provide quality, custom solutions, and personalized customer service.
Find a window installation service near you.
Frequently Asked Questions
How much of a gap is needed around the window?
A gap of approximately 1/4″ to 3/4″ between the window frame and the rough opening is ideal. This space allows for proper shimming to get the window perfectly level, plumb, and square, and provides room for effective insulation. For precise new construction, the opening often needs to be 20mm wider and 30mm higher than the window product itself.
Can I install an awning window by myself?
While possible for a very experienced DIYer, it’s not recommended for most homeowners. Awning windows can be heavy and awkward to handle, requiring two people for safe placement. A precise, weatherproof installation is critical, and mistakes can be costly, potentially leading to leaks, drafts, and structural damage. For guaranteed results and peace of mind, hiring a professional is the safest bet.
What is the most critical part of the installation?
Proper flashing and sealing are the most crucial steps in any awning window installation. An improperly sealed window will inevitably lead to water leaks, drafts, and potentially severe structural damage like rot and mold. This compromises both your window’s performance and your home’s integrity, making meticulous attention to flashing tape application and sealant beads paramount.
Conclusion: Ensure a Lasting Upgrade with Expert Installation
A properly installed awning window improves your home’s comfort, value, and energy efficiency. While this guide outlines the key steps, the precision required to achieve a perfect, long-lasting seal is best left to experienced professionals. For homeowners in the Chicago area, the team at Perfect Windows & Siding provides the expertise and quality craftsmanship needed to ensure your investment is protected. Ready to upgrade your space with expertly installed awning windows? Explore our professional window installation services to get started.