

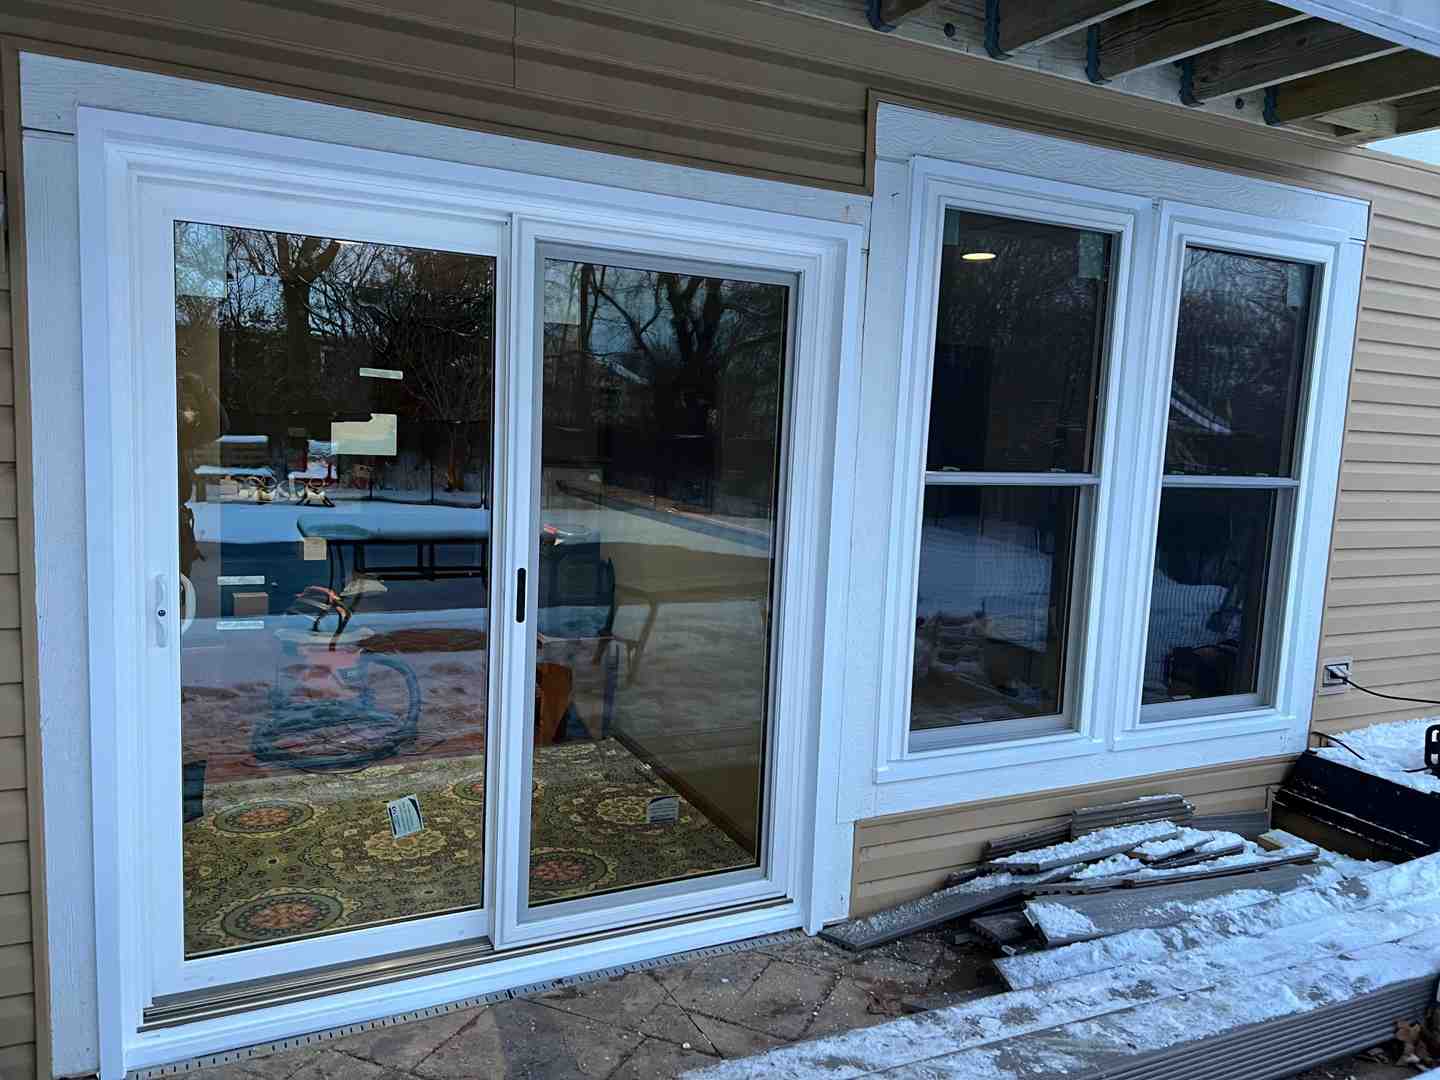
Why Exterior Threshold Installation Is Worth Getting Right
Exterior threshold installation is the process of fitting a weatherproof strip at the base of your exterior door — and doing it correctly is one of the most effective ways to block drafts, keep water out, and lower your energy bills.
Here’s a quick overview of how it’s done:
- Remove the old threshold — cut it in half with a reciprocating saw and pry out the pieces.
- Inspect and treat the subsill — check for rot and apply a borate solution if needed.
- Install a sill pan — apply self-adhering flashing membrane as a moisture barrier.
- Measure, notch, and fit the new threshold — cut notches around the door jambs for a tight fit.
- Secure and seal — use construction adhesive, expanding foam, and silicone caulk.
- Adjust the height — use jack screws so the door sweep makes proper contact.
- Test the seal — use the playing card tension test to confirm no drafts are getting through.
A worn or poorly installed threshold lets in cold air, moisture, insects, and energy loss — all things Chicago-area homeowners can’t afford to ignore, especially through harsh winters.
The good news: this is an intermediate DIY project that most homeowners can complete in under two hours with the right tools and preparation.
I’m Voytek Glab, owner of Perfect Windows & Siding, and over my 20+ years of hands-on entry door work across the Chicagoland area, exterior threshold installation has been one of the most common — and most impactful — fixes I’ve seen homeowners overlook. In this guide, I’ll walk you through every step so you can get it done right the first time.
Discover more about exterior threshold installation:
Exterior Thresholds vs. Interior Transitions: Key Differences
While both components sit at the bottom of a doorway, exterior thresholds and interior floor transitions serve completely different purposes. Mixing up their designs or installation methods can lead to major water damage inside your home.
An interior transition strip is designed for aesthetics and basic foot traffic. Its main job is to cover the expansion gap between two different flooring materials—such as hardwood meeting tile—and to prevent tripping. It lies flat, has no built-in slope, and does not feature any seals to block air or water.
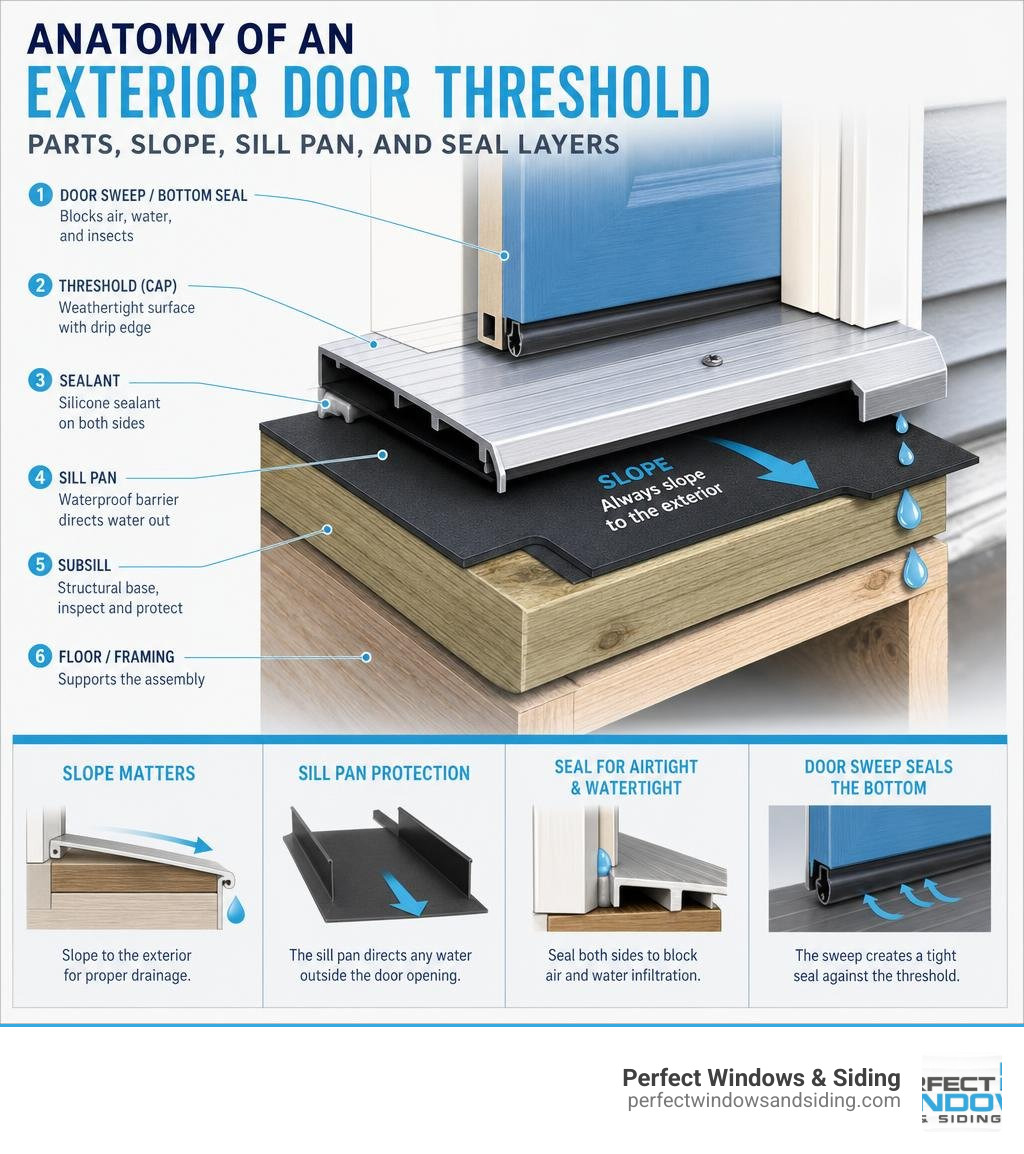
An exterior threshold, on the other hand, is a highly engineered weather barrier. Its primary job is to protect your home’s structural framing from the elements. To do this, it is manufactured with a built-in slope—usually between 5 and 7 degrees—which uses gravity to pitch water away from the door. It also features a specialized groove or lip called a rabbet, which breaks the surface tension of water and prevents rain from creeping backward under the door slab. Finally, it must withstand extreme temperature swings, wind-driven rain, and heavy foot traffic.
| Feature | Exterior Thresholds | Interior Transitions |
|---|---|---|
| Primary Purpose | Weatherproofing, water shedding, and thermal sealing | Flooring transition and trip prevention |
| Design Profile | Sloped (5 to 7 degrees) with a water-shedding rabbet | Flat or gently beveled |
| Weatherstripping | Integrates with door sweeps, vinyl bulbs, or gaskets | None |
| Typical Materials | Heavy-duty aluminum, brass, or treated hardwoods (like oak) | Oak, maple, metal, or vinyl strips |
| Moisture Resistance | Extremely high; requires subfloor flashing and silicone | Moderate to low; designed for dry interior spaces |
Understanding these differences is crucial before starting your project. Installing a flat, non-sloped piece of wood at an exterior entry will inevitably allow water to pool, rot your subfloor, and ruin your interior flooring.
Preparing for Your Exterior Threshold Installation
Before you run to the home improvement store or rip out your existing entryway, you need to evaluate the structural integrity of your door frame. If the rough opening is warped, out of plumb, or settling, simply throwing a new threshold into the space won’t solve your draft or water problems.
When we handle a Door Replacement Chicago homeowners often ask why we spend so much time checking the frame. The reason is simple: a door is a system of moving parts. If the side jambs are bowed or the subfloor has sagged, the door slab will not sit squarely in the opening. This means your new threshold won’t align with the door sweep, leaving gaps that let the cold winter wind howl right into your hallway.
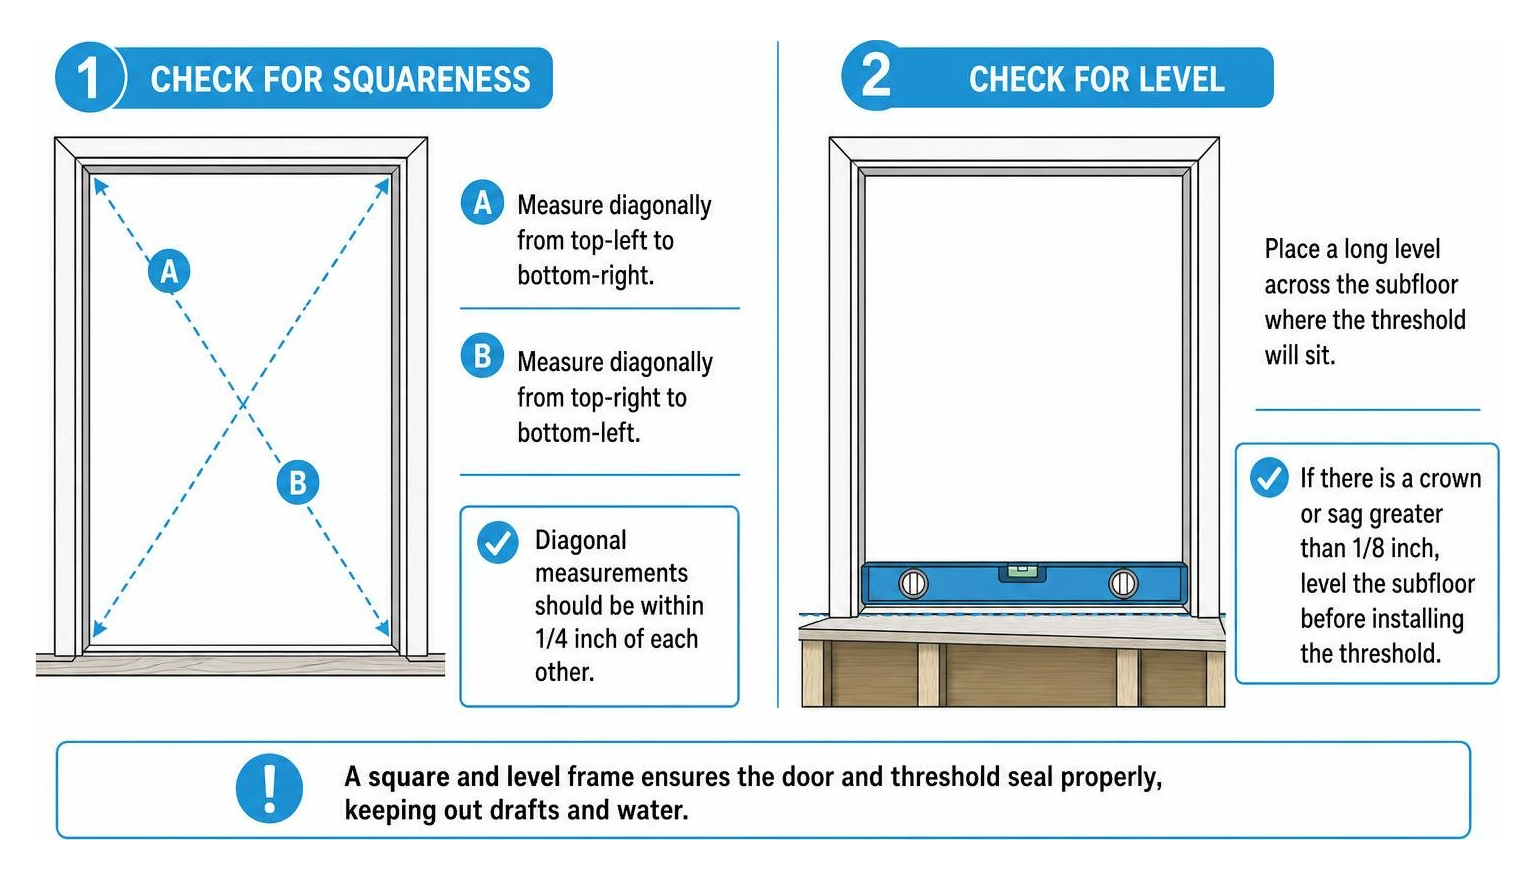
Start by checking the rough opening for squareness, level, and plumb. Take diagonal measurements from the top-left corner to the bottom-right corner, and then from the top-right to the bottom-left. These two diagonal measurements should be within a quarter-inch of each other. Next, lay a long level across the subfloor where the threshold will sit. If there is a crown or a sag greater than an eighth of an inch, you will need to level the subfloor before proceeding.
Measuring and Preparing the Rough Opening
Accurate measurements are the foundation of a successful exterior threshold installation. You cannot rely on standard door sizes; older homes in historic suburbs like Wilmette, Hinsdale, or Park Ridge often feature custom-built entryways with non-standard dimensions.
Use a high-quality tape measure to take three separate width measurements of the door opening: at the bottom, the middle, and the top. Write down the smallest measurement. Next, measure the exact width of your door jambs. The threshold must cover the entire depth of the jamb from the interior flooring edge to the exterior siding or brickmold.
Use a carpenter’s square to check the angle between the side jambs and the subfloor. If the jambs are not perfectly perpendicular, you will need to custom-trim the ends of your new threshold to match the slight angle. Clear away any old carpet trim, weatherstripping, or transition strips from the interior side of the doorway so you have a clean, unobstructed workspace.
Essential Tools and Materials for Exterior Threshold Installation
Having the correct tools on hand will keep your project moving smoothly and prevent mid-project runs to the hardware store. To complete this job like a professional, gather the following tools:
- Reciprocating saw (fitted with a wood- or metal-cutting blade)
- Pry bar or flat claw bar
- Hacksaw or jigsaw (for cutting aluminum or composite thresholds)
- Hammer and chisel
- Caulking gun loaded with high-quality, 100% silicone sealant
- Low-expansion polyurethane expanding foam (specifically formulated for doors and windows)
- Wood shims (non-compressible composite shims are highly recommended)
- Borate wood preservative solution
- Self-adhering flashing membrane (sill flashing tape)
For a solid overview of the standard tools used by professional contractors, you can consult the This Old House threshold replacement guide to see how these tools are utilized on-site.
Step-by-Step Guide to Exterior Threshold Installation
With your tools gathered and your measurements verified, it is time to begin the actual installation process. This is where we focus heavily on water management. In our wet, snowy Chicagoland climate—from wind-driven rain off Lake Michigan in Evanston to heavy snow accumulation in Schaumburg—proper flashing under the threshold is non-negotiable.

Removing the Old Sill and Creating a Sill Pan
Removing an old, rotted, or worn-out threshold requires patience. If you pry too aggressively, you risk splintering the bottom of your expensive door jambs or damaging the exterior brickmold.
- Cut the old threshold: Using a reciprocating saw, make two relief cuts across the old threshold, spaced about 8 to 10 inches apart near the center of the doorway. Cut at a slight bevel angle; this helps the center section slide out easily without binding.
- Pry out the center: Insert a pry bar under the center cut piece and gently pop it free from the subfloor.
- Slide out the end pieces: Carefully tap the remaining end pieces toward the center of the opening to slide them out from underneath the door jambs. Watch out for old transport screws or nails driven through the side jambs into the threshold; back these out or cut them with your saw.
- Inspect and treat the wood: Inspect the exposed wooden subsill for signs of moisture damage or wood-destroying insects. If you find soft, rotted wood, it must be cut out and replaced. If the wood is structurally sound but shows minor water staining, treat it thoroughly with a borate solution to prevent future fungal growth and repel termites.
- Build a sill pan: A sill pan is your ultimate insurance policy against water damage. Cut a piece of self-adhering flashing membrane to the width of your doorway plus three inches. Lay the flashing across the subfloor, folding it so it climbs up the inside of the side jambs by at least 1.5 inches to create a watertight “dam.” This ensures that any water that manages to bypass your outer seals is directed back outside rather than soaking into your home’s subfloor.
Notching, Fitting, and Securing the New Threshold
Most high-quality replacement thresholds are sold slightly longer than the door opening to allow for custom fitting. You will need to notch the ends of the threshold to fit around the door jambs and extend slightly under the door stops.
- Create a template: Use a piece of stiff cardboard or a quarter-inch scrap of hardboard to scribe a template of the jamb profile on each side of the doorway. This is much more accurate than trying to measure the complex notches with a tape measure.
- Transfer and cut: Transfer the template lines to the ends of your new threshold. Double-check that you are cutting the notches on the correct side (the wider, sloped side always points toward the exterior). Cut the notches carefully using a jigsaw or a hacksaw, keeping your blade perfectly square to prevent angled cuts on the visible surface.
- Dry-fit the threshold: Slide the notched threshold into place from the inside of the house, pushing the thinner outside edge forward first. It should fit snugly against the side jambs without forcing it. There should be a uniform, tiny gap (about 1/16 of an inch) on each side to allow for seasonal expansion.
- Apply adhesive and foam: Pull the threshold back out. Apply three thick, continuous beads of heavy-duty construction adhesive across the flashing membrane on the subfloor. Next, run a thin bead of low-expansion polyurethane foam along the interior edge of the opening to create a continuous thermal barrier.
- Secure the threshold: Slide the threshold back into its final position. Press down firmly to embed it in the adhesive. If your threshold features pre-drilled screw holes, pre-drill pilot holes into the subfloor and secure it with heavy-duty exterior-grade screws. If you are installing an all-wood threshold without screw holes, use non-compressible composite shims beneath it to level it, and then secure it using casing nails or hidden screws hidden under the adjustable vinyl insert.
Sealing and Weatherproofing the Installation
A threshold is only as good as its perimeter seals. Without proper caulking, water will seep around the sides of the metal or wood, rotting out the bottom of your door frame over time.
Apply a generous, unbroken bead of 100% silicone sealant where the threshold meets the wooden door jambs on both the interior and exterior sides. Do not use cheap latex caulk here; it will shrink, crack, and fail within a single season of exposure to our harsh local weather. Pay special attention to the joints where the threshold meets the exterior brickmold or siding.
To complete the weather barrier at the bottom of your entryway, you should also ensure your door sweep is in excellent condition. If your sweep is worn, take a look at our guide on how to Install Door Weather Stripping to ensure a draft-free seal.
Fine-Tuning, Adjusting, and Weatherproofing the Seal
Once the threshold is physically secured and sealed, you must adjust it to interact correctly with the bottom of your door. If the threshold is adjusted too low, cold air and insects will easily bypass the seal. If it is adjusted too high, the door will bind, making it difficult to latch and causing rapid wear on your door sweep.
Adjusting the Cap Height for a Perfect Seal
Modern high-quality thresholds feature an adjustable wooden or composite cap. This cap is held in place by several heavy-duty screws (often referred to as jack screws) spaced evenly across the width of the threshold.
To adjust the height:
- Locate the adjustment screws: These screws are typically visible on the top surface of the threshold cap, though they may be covered by small plastic or vinyl beauty caps. Use a pocketknife blade or your thumbnail to gently pry these covers off.
- Turn the screws: Using a flathead or Phillips screwdriver, turn the screws clockwise to lower the cap, or counterclockwise to raise it.
- Adjust evenly: Work your way across the threshold, turning each screw a little bit at a time. You want to raise or lower the entire cap evenly to avoid warping or cracking the adjustable strip.
For a deeper dive into the mechanics of adjustable sills and how to troubleshoot binding issues, check out the Innovative Storm Defense threshold guide for professional adjustment tips.
The Playing Card Tension Test for Exterior Threshold Installation
How do you know when your threshold is adjusted to the absolute perfect height? Professional installers use a simple, reliable trick called the playing card test.
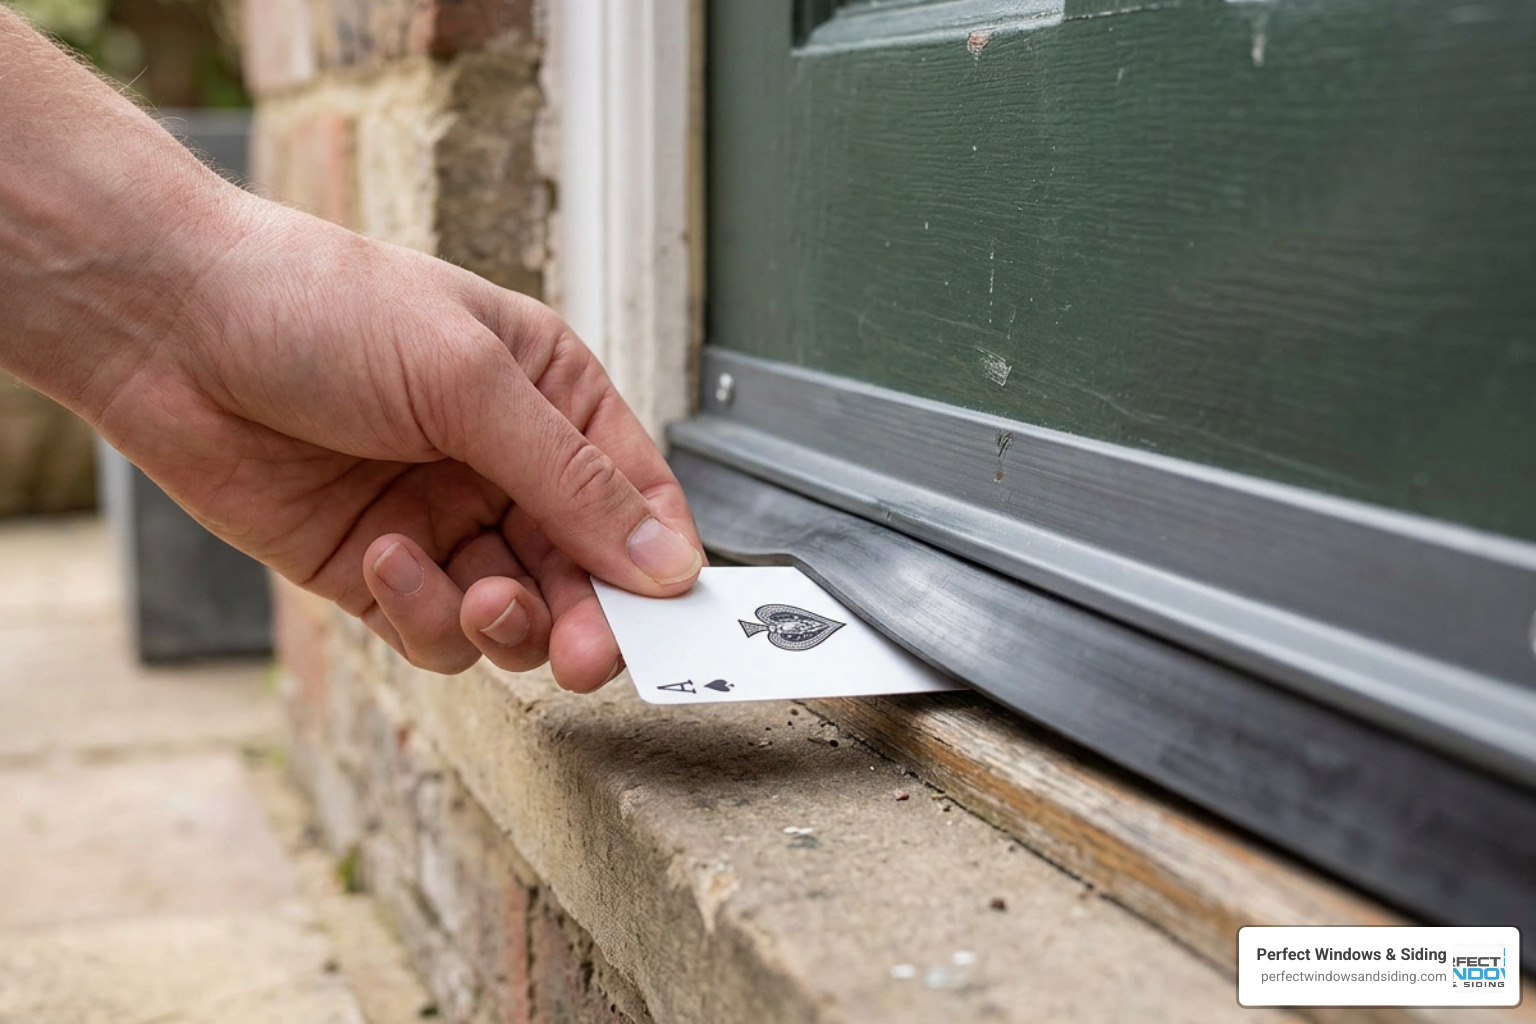
Close the door completely. Take a standard playing card (or a dollar bill) and slide it between the door sweep at the bottom of the door and the adjustable threshold cap. Gently pull the card toward you.
- If the card slides out with zero resistance, the threshold is too low. You have a draft gap. Raise the threshold cap slightly by turning the adjustment screws counterclockwise.
- If the card is stuck, tears, or requires significant force to pull out, the threshold is too high. This will cause your door to bind and ruin the sweep. Lower the cap slightly by turning the screws clockwise.
- If you feel a slight, firm resistance—similar to the drag of a magnet on a refrigerator door—but the card still slides out smoothly without tearing, your threshold is perfectly adjusted.
Repeat this test at three or four different points across the width of the door to ensure a uniform seal from jamb to jamb. If you find that your door sweep is too damaged to seal properly even after adjusting the threshold, you may need to learn How to Replace Door Weather Stripping to restore your home’s thermal envelope.
Frequently Asked Questions about Exterior Thresholds
How do I remove an old exterior threshold?
To remove an old exterior threshold safely, start by clearing away any storm doors or exterior trim that might block your access. Use a reciprocating saw to make two angled crosscuts through the center of the old threshold, spaced about 10 inches apart.
Once the cuts are made, use a heavy-duty pry bar to pop the center section upward and out of the opening. With the center removed, you can gently tap the remaining end pieces toward the center of the doorway to slide them out from under the side jambs. Be sure to check for and remove any old transport screws or nails that may have been driven through the side jambs into the threshold ends before pulling them free.
How does the installation differ for combination sills versus separate component sills?
The installation process depends heavily on the era and design of your door frame:
- Separate Component Sills: Common in homes built before 1970, these systems feature a separate wooden or metal threshold that sits on top of a continuous subfloor sill. To replace these, you simply remove the old threshold piece and slide a new, matching component back into the existing space, sealing it thoroughly.
- Combination Sills: Modern pre-hung doors feature a one-piece combination sill and threshold system where the side jambs are fastened directly to the ends of the sill at the factory. Replacing just the threshold on a combination sill is highly complex because the entire unit is integrated. In many cases, if a combination sill is severely damaged or rotted, it is smarter to replace the entire door unit or hire a professional to install support blocks and retrofitted components to maintain structural integrity.
What common mistakes should I avoid during installation?
Over our two decades of working in the Chicago suburbs, we have seen several recurring DIY mistakes that lead to premature threshold failure:
- Skipping the sill pan: Many homeowners install a new threshold directly onto the wooden subfloor without a flashing membrane. Without this barrier, any water that seeps past the caulk will slowly rot the subfloor.
- Using high-expansion spray foam: Standard expanding foam exerts immense pressure as it cures. If you use it under a threshold, it can bow the threshold upward, preventing the door from closing. Always use specialized, low-expansion foam designed for doors and windows.
- Incorrect shimming: Failing to place solid, non-compressible shims directly under the load-bearing points of the threshold will cause it to sag, crack, or squeak when stepped on.
- Using cheap interior caulk: Always use 100% silicone or high-grade polyurethane sealant. Cheap acrylic caulks will crack and fail during the first freeze-thaw cycle of a Chicago winter.
Conclusion
A successful exterior threshold installation is one of the most cost-effective ways to protect your home from water damage, eliminate drafts, and improve your daily comfort. While it is a manageable project for an experienced DIYer, achieving a perfectly watertight, square, and seamless fit in older homes with settled foundations can be incredibly challenging.
If you run into structural rot, out-of-square door frames, or simply want the peace of mind that comes with professional craftsmanship, we are here to help. At Perfect Windows & Siding, we have spent over 20 years providing custom, high-quality window, siding, and door solutions to homeowners across the Chicagoland area—including Des Plaines, Park Ridge, Morton Grove, and the surrounding suburbs. We back our work with an industry-leading lifetime warranty and a commitment to personalized, family-owned service.
Ready to secure your home’s entryway against the elements? Schedule your consultation with us today to receive a free estimate and experience the difference that professional craftsmanship makes.